
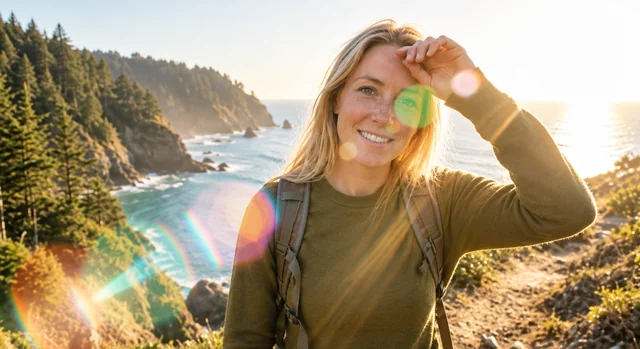
Remove Sun Glare from Photo Shots
Lens flare streaks and a washed-out corner disappear, while the warm backlight and the coastline stay. The face and sweater get their color back.
Upload a shot spoiled by a bright patch. The AI finds sun glare, flash hotspots, lens flare, and reflections on glass, or you brush over the exact spot, then it rebuilds the color and texture hidden underneath.
Fine-tune
Your photo stays in this browser during this UI preview.
Reference example. It is not a result generated from your upload.
Photo glare happens when strong light bounces straight into the lens: the sun low in the frame, an on-camera flash, a ceiling light on a glossy box, or a shop window between you and the subject. The bright patch burns out the detail beneath it. A photo glare remover finds those blown highlights and reflections and rebuilds the skin, sky, label, or scene they were hiding, instead of simply darkening the whole image.
This glare remover AI works on portraits, outdoor shots, product photos, and scans. Use it when you cannot reshoot, such as a once-only moment or an old print. Very large glare areas are reconstructed from the surrounding detail, so the result is a careful estimate of what was there rather than recovered data.
Drag each slider to compare the original shot with the cleaned version.
Lens flare streaks and a washed-out corner disappear, while the warm backlight and the coastline stay. The face and sweater get their color back.

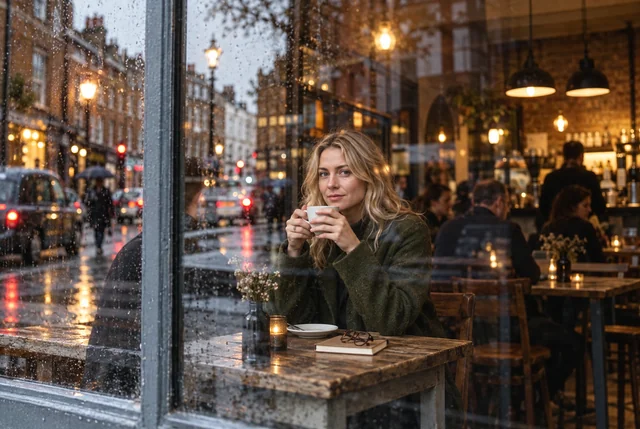
Shooting through glass layers the street over your subject. Removing reflections separates the two, so the café interior and the person inside read clearly.


A direct flash leaves a white hotspot on the forehead and nose. The AI restores an even, matte skin tone with natural texture instead of a plastic blur.
Wondering how to remove a glare from a photo without Photoshop, layers, or a clone stamp? Here is the whole process.
Add a JPG, PNG, or WebP up to 10 MB: a portrait, an outdoor shot, a product photo, or a scan of an old print.
Leave it on Auto-detect or choose sun glare, flash shine, window reflection, or glasses glare. To fix one spot only, brush over it or drag a box around a wider reflection. Use Gentle to keep soft highlights or Strong for heavy hotspots.
Start the removal, compare the result with your original, and save the clean photo.
One glare removal tool for the four problems people bring most often.
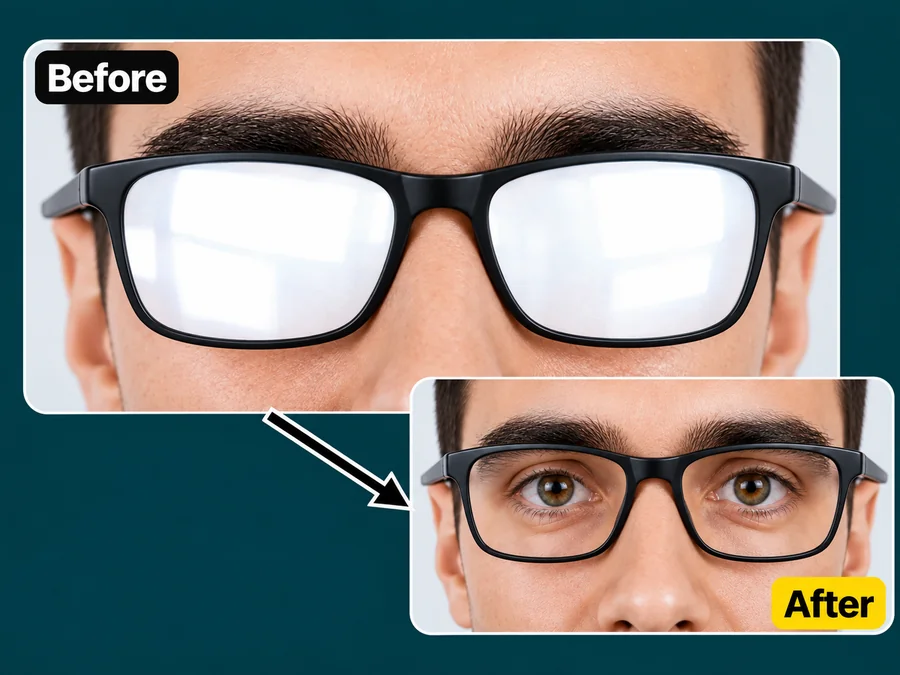
Two white blocks where the eyes should be ruin a portrait. The lenses clear so eyes, lashes, and brows come back, while the frames stay exactly as they were.
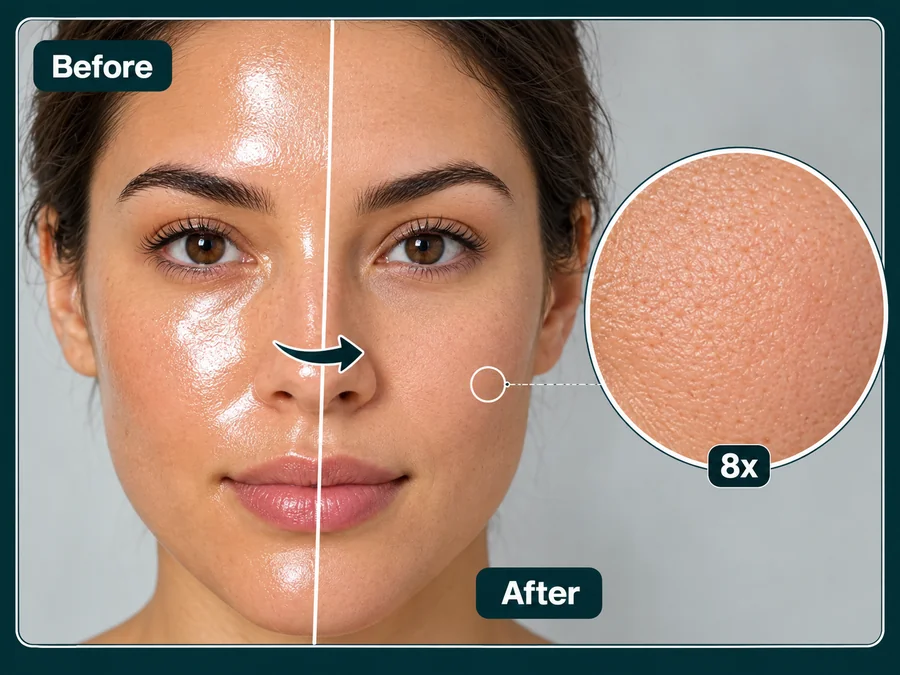
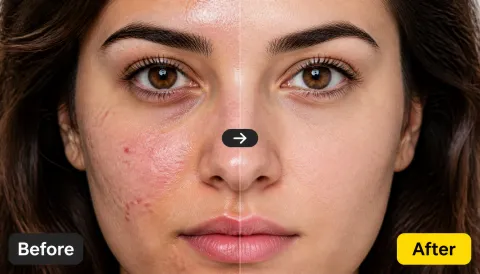
Flash and strong indoor light leave an oily shine across the forehead, nose, and cheeks. The skin returns to an even tone with real pores, not a smoothed, airbrushed surface.
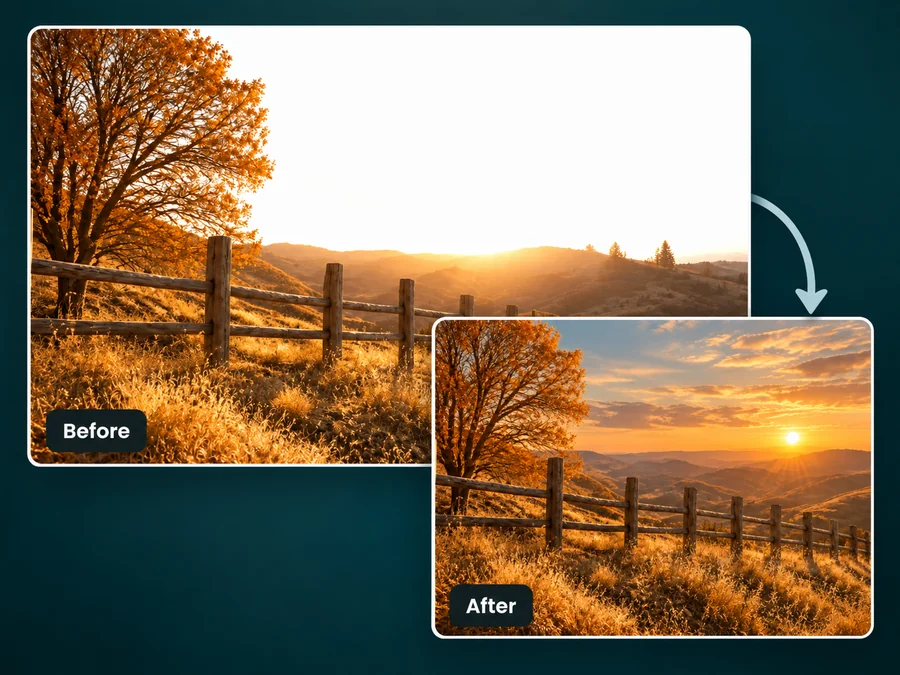
Shooting toward the sun washes out a whole corner of the frame. If you are wondering how to remove sun glare from photo backgrounds, this is it: the sky gradient and horizon return while the rest of the light stays the same.
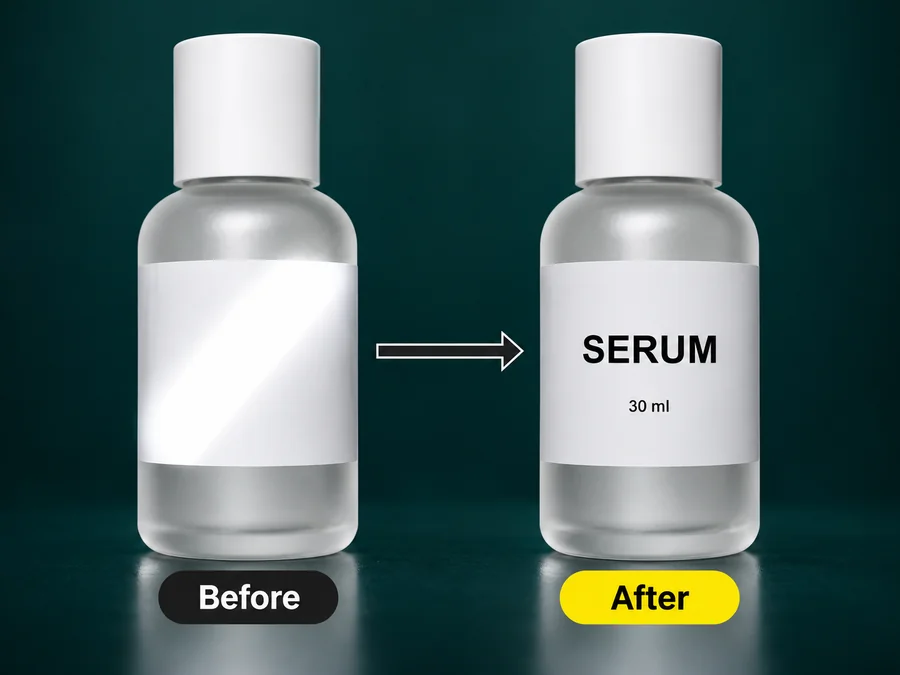
A hard highlight across a bottle, phone screen, or laminated card hides the label. The surface gets its print and texture back and keeps the soft sheen that shows what it is made of.
Where glare removal saves a photo that would otherwise be thrown away.

Clear the ceiling-light streak from glossy packaging so buyers can read the label.
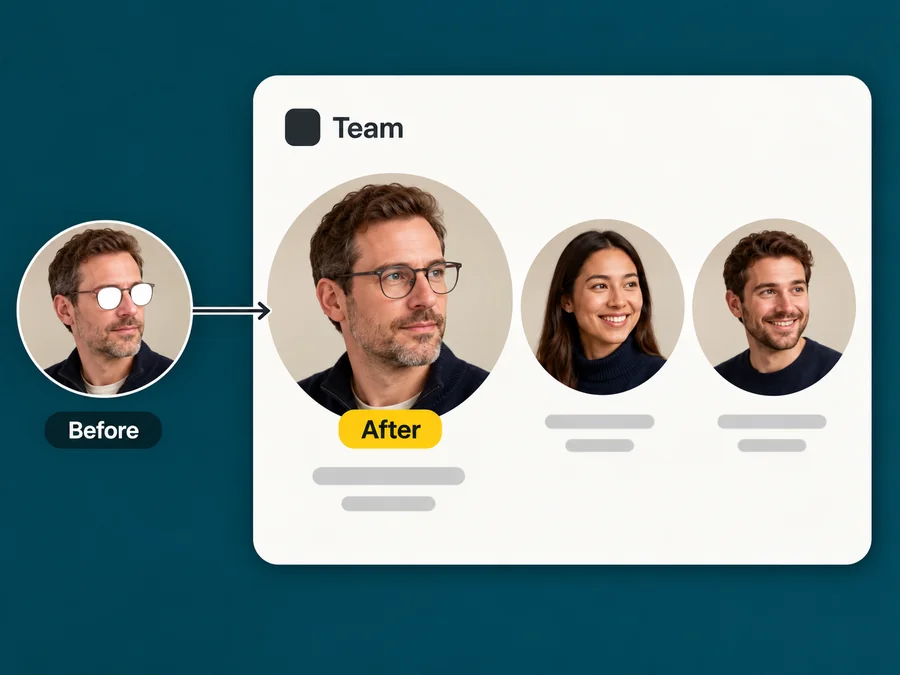
Remove lens glare so the eye contact in a profile photo comes back.
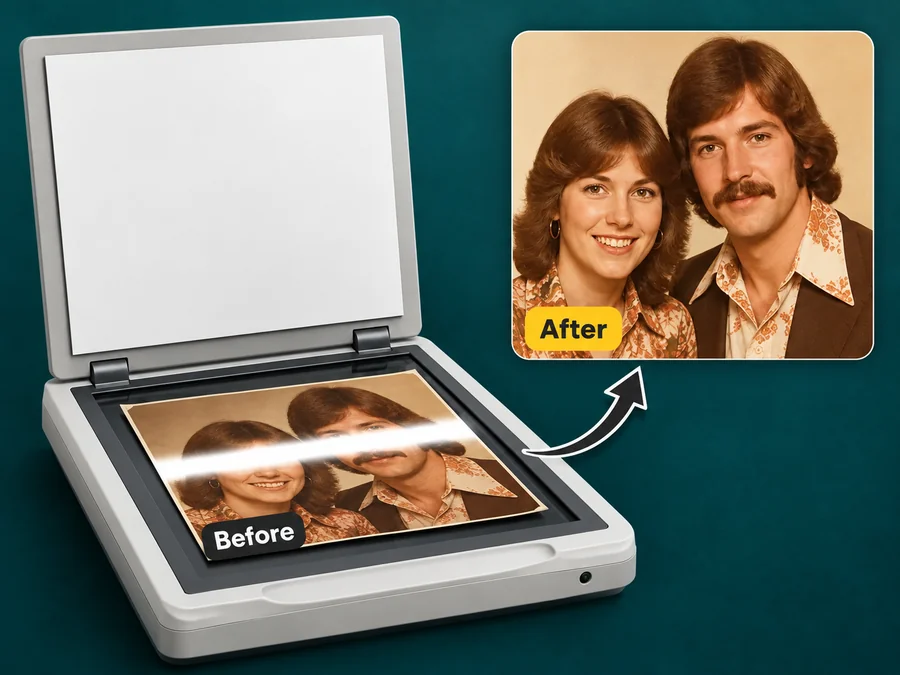
Lift the milky band a scanner lamp leaves across glossy family photos.
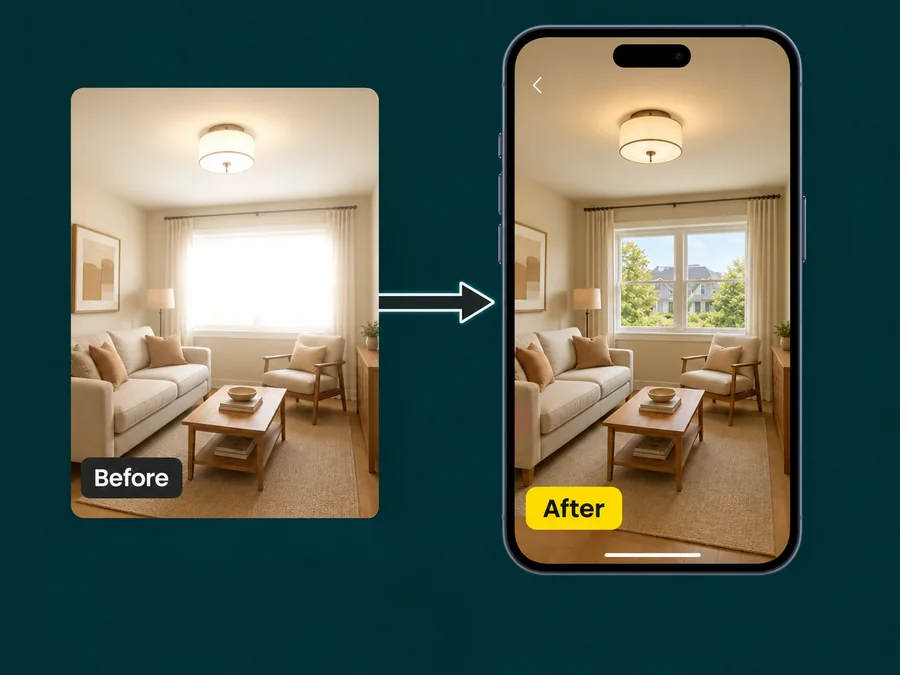
Clear window and lamp reflections from camera-roll photos before you share them.
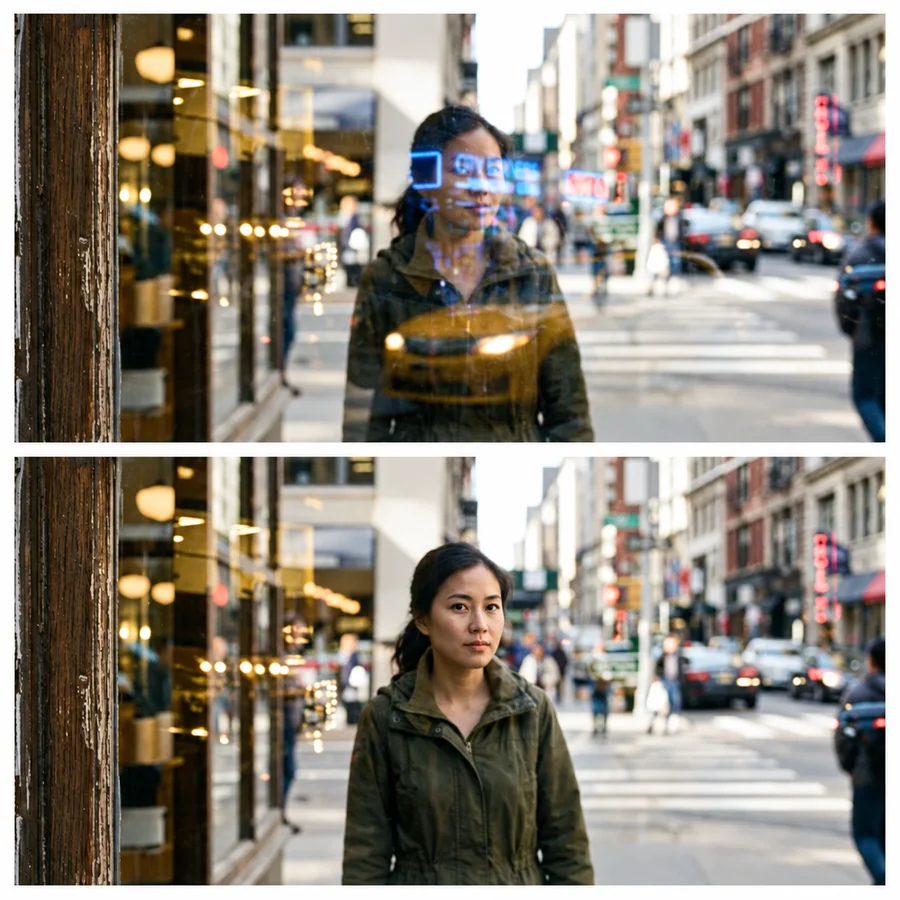
Photos through train, plane, and bus windows pick up ghost reflections. Remove them and keep the view you actually saw.
Glossy packaging, jewelry, and glass bottles bounce studio light. Clean hotspots so shoppers see the real finish.
Windows, glossy floors, and clear-coat paint reflect everything. Reduce glare in photos of rooms and vehicles without changing the scene.
Phone snapshots of old prints and frames under glass come back with a bright band. Clear it before restoring or sharing.
Learning how to remove glare from photos starts before you press the shutter. A few habits reduce glare at capture time, and the AI handles the rest.
Step a little to the side so the light source no longer bounces straight into the lens.
Flash right on glasses or glossy skin creates hotspots. Use window light or bounce the flash when you can.
When shooting through a window, put the phone right against the glass to block most reflections.
If glare still slips in, start from the full-resolution original rather than a screenshot so more detail survives, and brush over a small hotspot so only that area is rebuilt.
How people use glare removal on shots they could not retake.
Illustrative examples adapted from reference material, not verified reviews of EzImgMaker.
Every headshot from our lighting setup came back with white rectangles on the client’s glasses. Now I clear the lenses first and the frames stay sharp.
Our skincare jars always had one hot streak down the front. Removing it left the label readable and saved most of our reshoots.
Half of my grandmother’s prints scanned with a milky band across the faces. Clearing it first made the restoration step much easier.
Field photos of equipment often have the sun blowing out one side. Cleaning them before the report goes out saves a second site visit.
Answers about removing glare and reflections from pictures.
Upload the photo, keep the glare type on Auto-detect or pick the closest match, and start the removal. The AI finds the blown highlights and reflections and rebuilds the detail beneath them; brush over the glare first if you want the fix limited to that spot. Compare the result with your original before downloading.
Choose "Flash & skin shine" for hotspots from a flash or ceiling light, or "Window & glass reflection" for lamps reflected in glass. If the glare is small, brush over it or add a short note such as "the light reflected on the picture frame".
Yes. The page works in mobile browsers, so you can remove light glare from photo iPhone shots or Android pictures straight from your camera roll, no glare removal app required.
Select "Sun glare & lens flare". The AI rebuilds washed-out sky, faces, and edges from the parts of the frame the sun did not reach, and keeps the warm backlight you shot for.
Pick "Glasses glare". The lenses are cleared so the eyes show again, and the frames, rims, and the rest of the face are left as they were. For portraits where glasses glare is the main problem, see our dedicated glasses glare tool.
Choose "Window & glass reflection". The AI separates the reflected layer from the scene behind the glass and removes it, which also helps to remove reflection from photo shots of display cases, picture frames, and screens.
Marking is optional. On Auto-detect the AI finds the glare by itself. To change only one area, use the brush for small or irregular spots or the box for a wide reflection, and only the marked part is rebuilt. Either way, the pose, crop, background, and overall color are meant to stay the same. Gentle strength keeps natural highlights, while Strong is for heavy hotspots.
The AI fills large burned-out areas using the surrounding texture and color, so it can rebuild a believable surface. Because the original detail was never captured, treat a heavily reconstructed area as an estimate.
No, they are opposites. Glare is too much light burning out detail; a shadow is light being blocked. Use this tool for bright patches and a shadow remover for dark ones.
JPG, PNG, or WebP files up to 10 MB that you own or have permission to edit. Do not use reconstructed results to misrepresent a product’s condition or a document.
Upload a shot with sun glare, flash hotspots, or reflections and get the hidden detail back.