
How to Fix Grainy Photos: Phone, Desktop, and AI Methods
How to fix grainy photos: why noise shows up, how to remove grain from a photo on iPhone, Android or a computer, when AI helps, and how to avoid it next time.
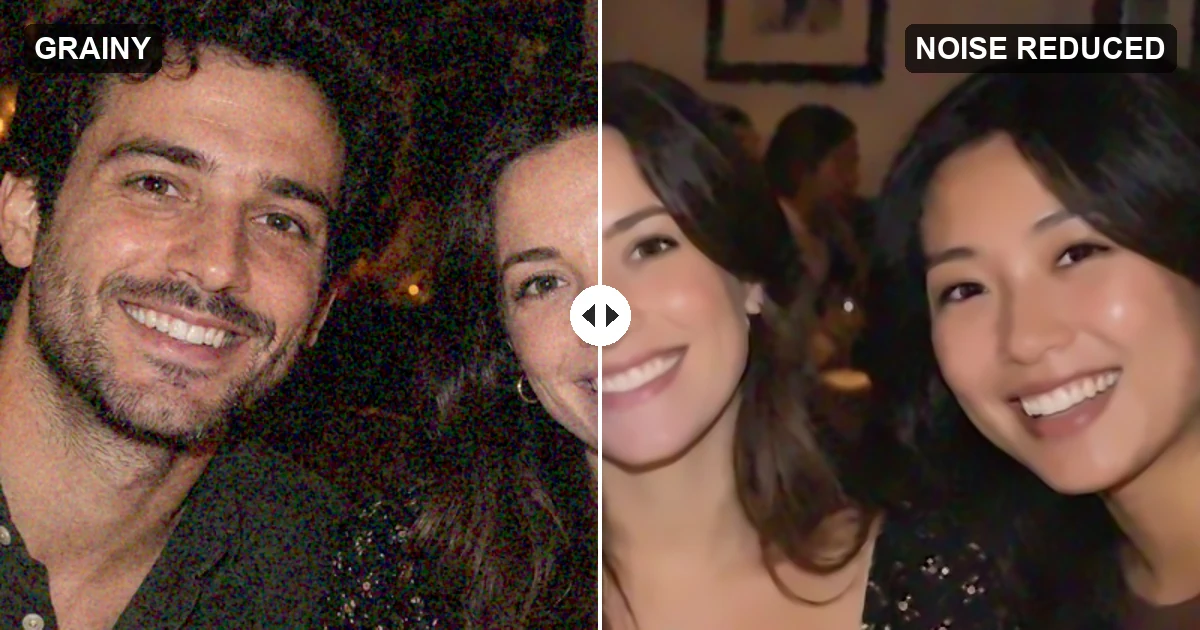
Short answer: to fix a grainy photo, apply noise reduction (color noise first, then luminance), keep sharpening low, and avoid brightening more than you need. For heavy grain or old scans, an AI enhancer usually rebuilds cleaner detail than a slider can. Next time, give the camera more light, a lower ISO, and a steady hand.
This guide covers how to fix grainy photos on your phone, in a desktop editor, and with AI, with before-and-after examples, and explains why grain appears in the first place so you can avoid it.
What Makes a Photo Grainy?
Grain is the speckled, sandy texture you see in dark or flat areas of a photo: a dim restaurant wall, a night sky, the shadow side of a face. In digital photos it is noise, random variation in brightness and color that the sensor records along with the image. It comes in two kinds, and most editors give each one its own slider:
- Luminance noise: fine gray speckles, like sand. It looks a bit like film grain and is the less objectionable of the two.
- Color noise: red, green, and blue blotches, most visible in shadows and smooth areas. It looks clearly digital and is the first thing to remove.
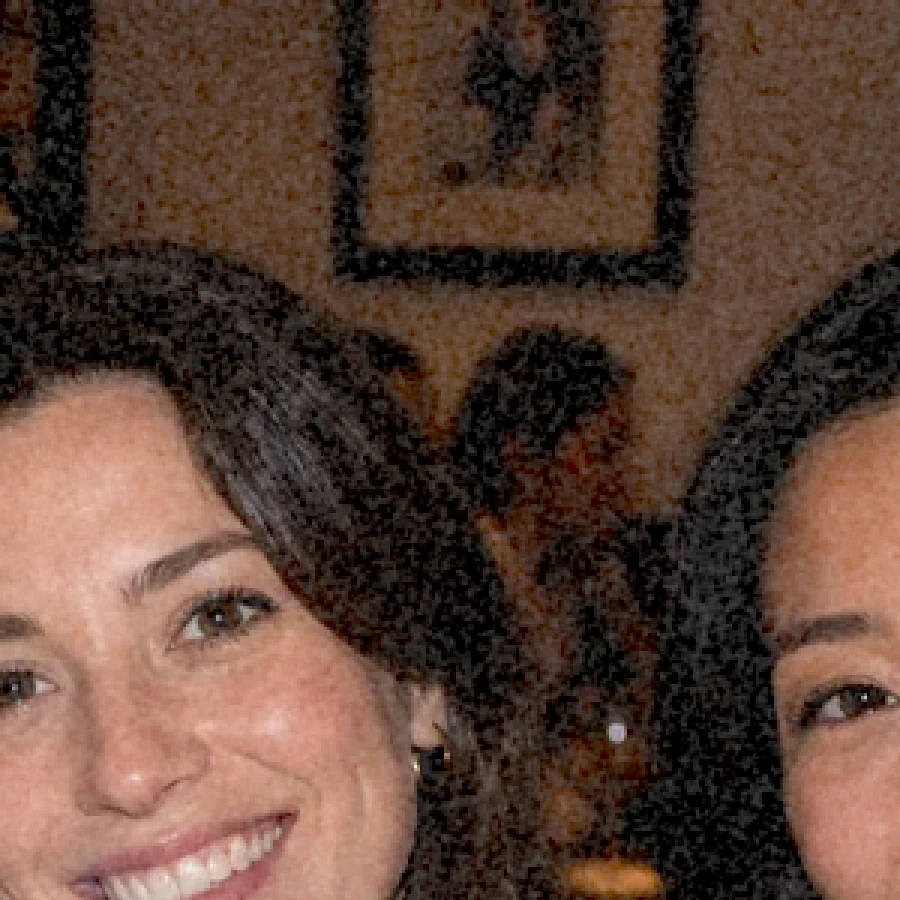
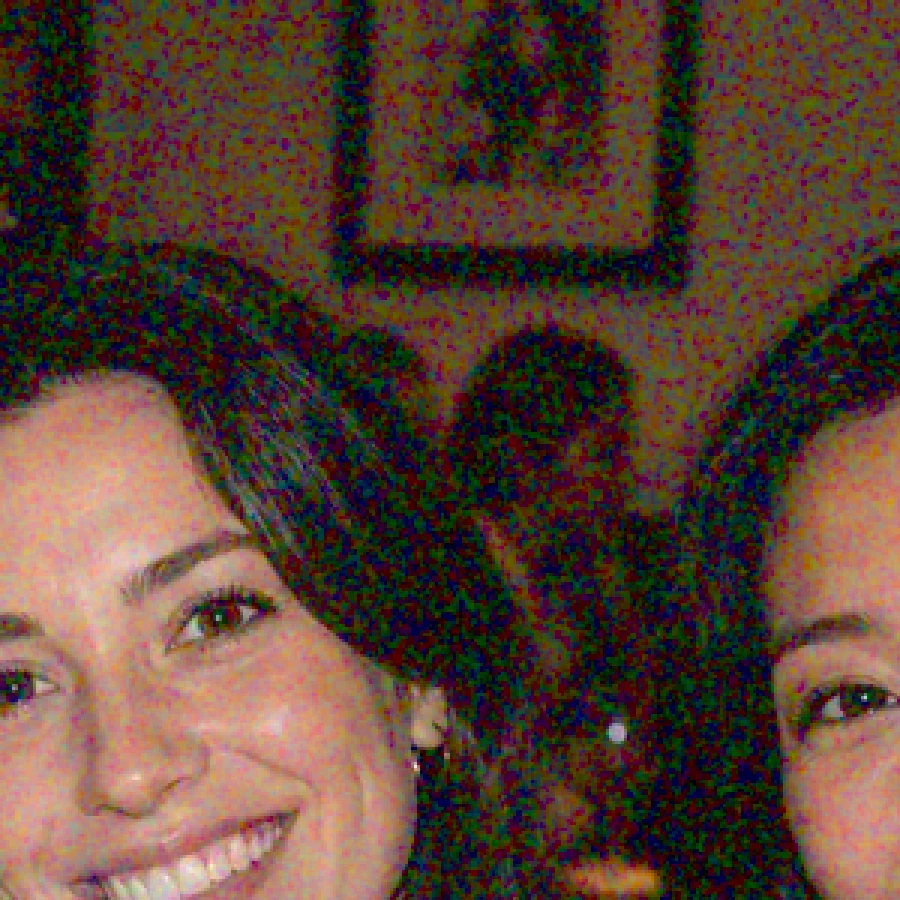
Demo crops enlarged 3x so the noise is visible: each type of noise was simulated separately on the same clean photo.
Three other problems often get called grain but need different fixes:
| Looks like | What it really is | Better fix |
|---|---|---|
| Blocky squares, halos around edges, banding in the sky | JPEG compression artifacts | Remove JPEG artifacts |
| Visible square pixels after enlarging a small image | Pixelation (low resolution) | Unpixelate image |
| A regular dot pattern or wavy lines on a scanned print | Halftone dots or moire | Descreen or moire fix |
| Even, organic texture on an old print or film scan | Real film grain | Light noise reduction, or keep it |
Why Your Photos Look Grainy: 7 Common Causes
- Low light and high ISO. When light is short, the camera raises the ISO, which amplifies the sensor signal and its noise along with it. This is the number one cause of grain.
- A small sensor. Phone sensors (and the small sensors behind the ultra-wide and telephoto lenses) collect less light per pixel than camera sensors, so they show noise sooner.
- Brightening a dark photo. An underexposed shot hides its noise in the shadows; lifting exposure or shadows in an editor brings it out.
- Digital zoom and heavy cropping. Zooming past the optical range or cropping deep into a photo enlarges every speckle.
- Long exposures and heat. Long shutter times and a warm sensor add extra noise and hot pixels, which is why night shots suffer most.
- Over-sharpening. Sharpening, Clarity, Structure, and Definition sliders exaggerate fine texture, grain included.
- Repeated compression and screenshots. Every re-save and messaging-app reshare adds compression noise and artifacts on top of the original grain.
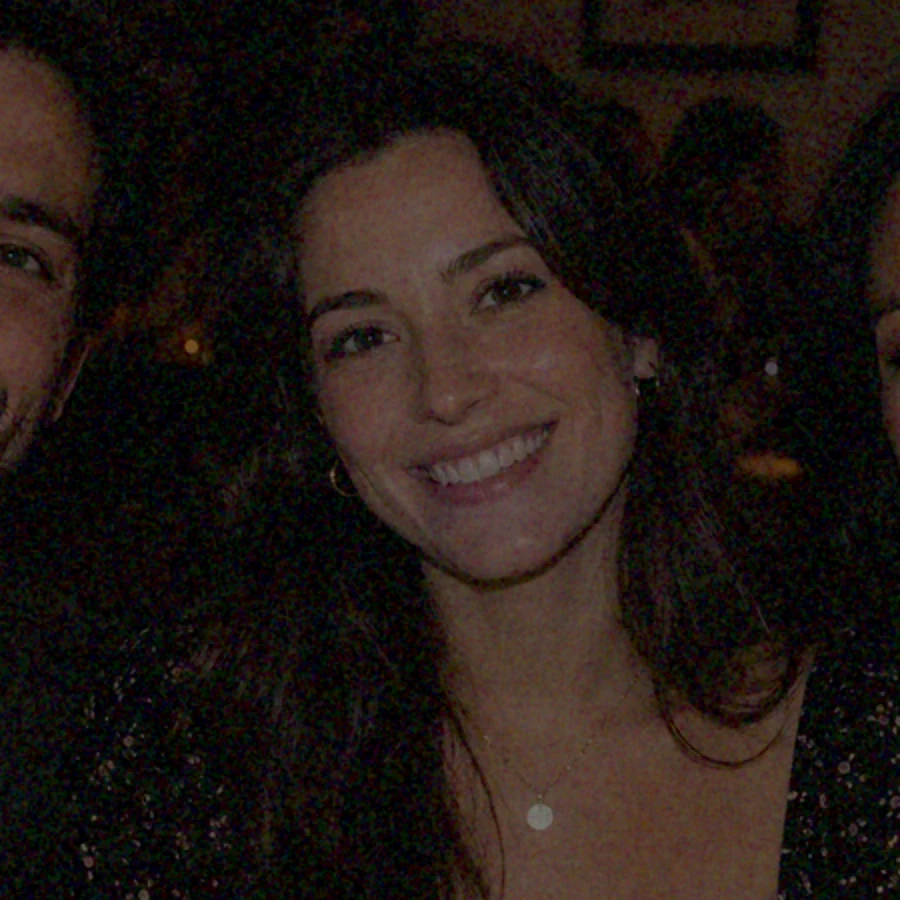
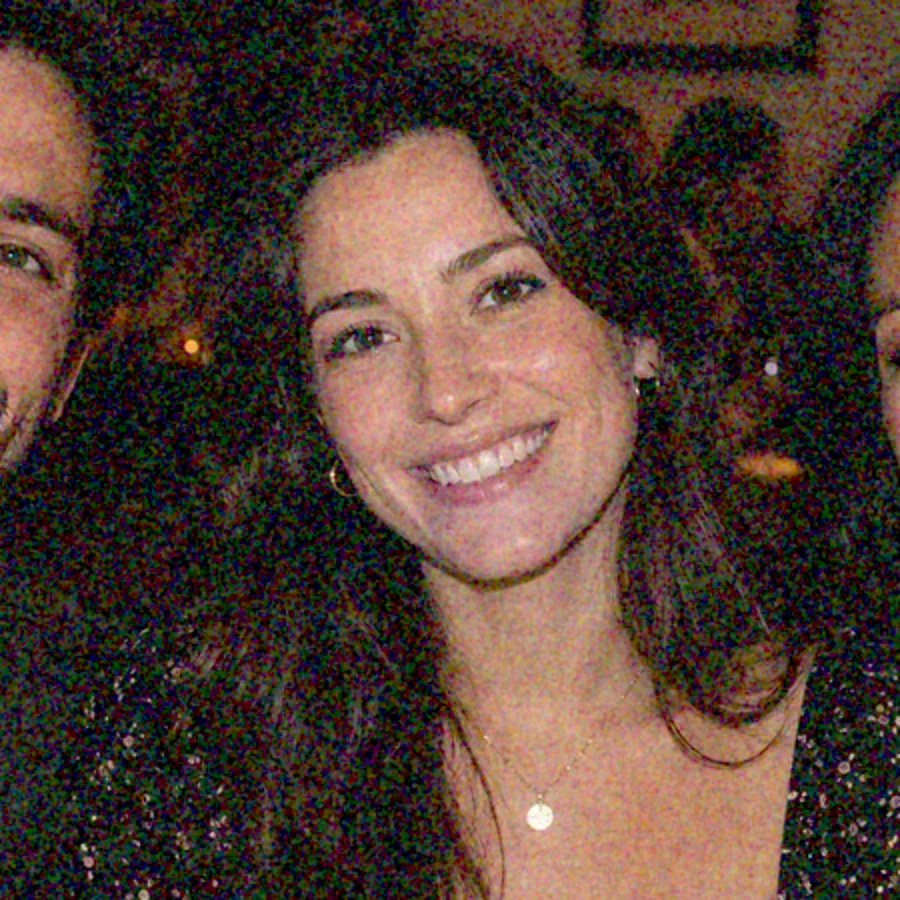
Demo: a dim-light capture simulated from a clean photo, shown as a 2x crop. The noise was in the dark file all along; brightening makes it visible.
How to Fix Grainy Photos in 5 Steps
Whatever editor you use, the workflow is the same. View the photo at 100% while you work, since grain is hard to judge on a zoomed-out preview.
- Fix exposure and color first. Set brightness, white balance, and contrast before noise reduction, because brightening changes how much noise you see. Brighten only as far as you need.
- Remove color noise. Raise Color Noise Reduction (or Color) until the colored blotches turn neutral. Values around 25 to 50 are common; too much can bleed colors at edges.
- Reduce luminance noise. Raise Noise Reduction or Luminance gradually, until the speckles soften but skin, hair, and fabric still have texture. If there are Detail and Contrast sub-sliders, use them to bring some texture back.
- Sharpen gently, with masking. Add a small amount of sharpening and raise Masking so flat areas such as skin and sky are not sharpened. Lower Clarity, Structure, or Definition if they are turned up.
- Export at full quality. Save as a high-quality JPEG or PNG; strong compression adds artifacts back.
Starting points for noise reduction:
| Grain level | Color noise reduction | Luminance noise reduction | Sharpening |
|---|---|---|---|
| Light (bright indoor, ISO 400 to 800) | 15 to 25 | 10 to 20 | Normal |
| Moderate (evening indoors, ISO 1600 to 3200) | 25 to 40 | 25 to 40 | Low, with masking |
| Heavy (night, ISO 6400 and up, or a brightened dark shot) | 40 to 60 | 40 to 60, or an AI denoise | Very low, or none |
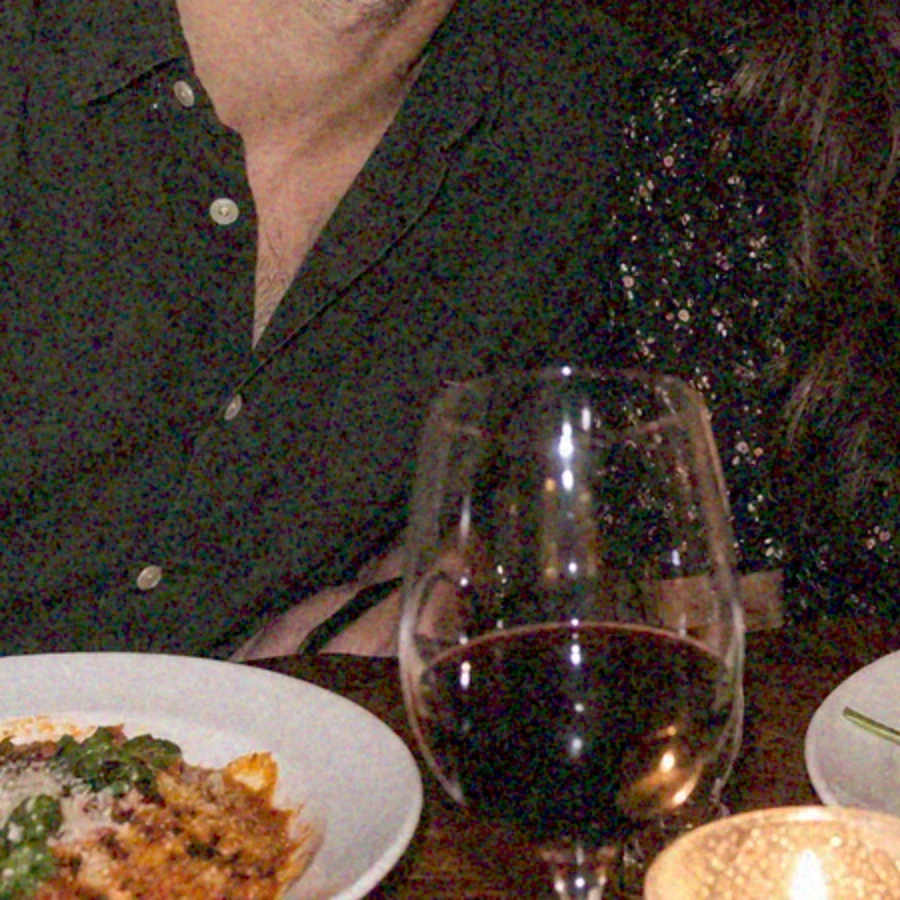
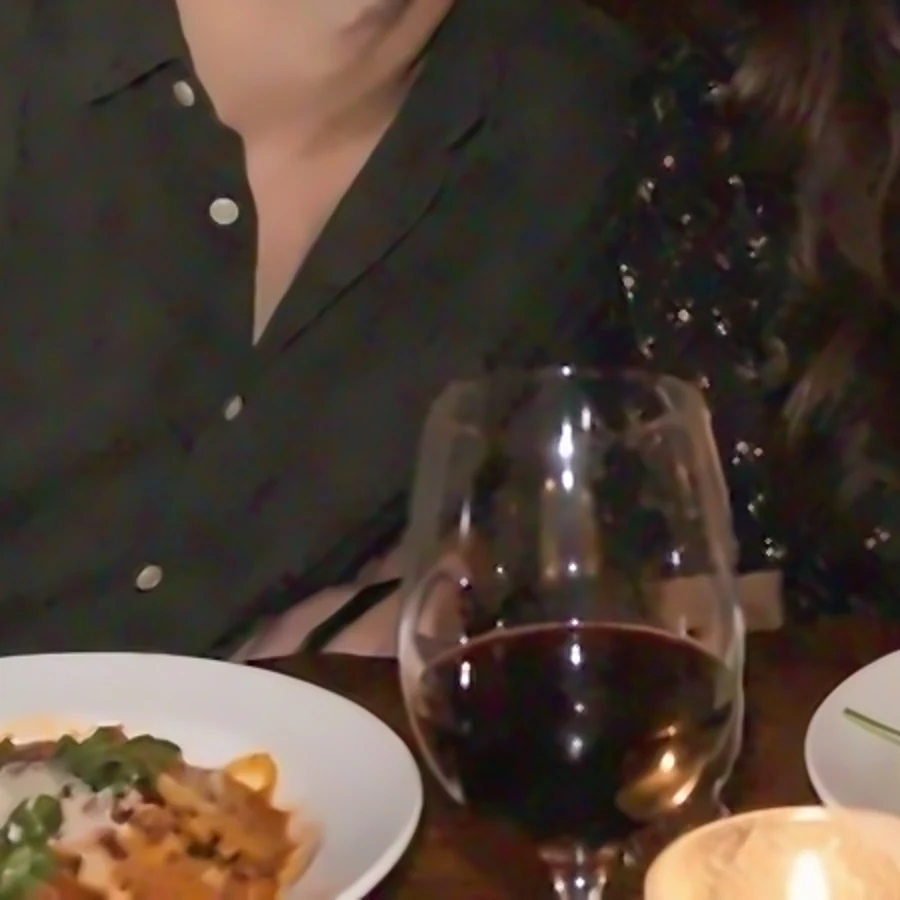
Demo: low-light noise simulated on a clean photo, then removed with color and luminance noise reduction and light sharpening. Shown as a 2x crop.
How to Make Photos Less Grainy on Your Phone
iPhone (Photos app)
- Open the photo and tap Edit, then Adjust.
- Scroll to Noise Reduction and raise it until the speckles soften.
- Lower Sharpness and Definition if they are above zero; both make grain more visible.
- If the photo is dark, raise Shadows or Exposure only a little, then check the grain again.
- Tap Done. You can revert to the original later.
Android phones
Gallery apps vary between phone makers. In most, tap Edit, open Adjust (or Tools), and look for Denoise or Noise reduction. If your built-in app has no noise slider, free mobile editors usually include one in a "Details" or "Tune" section, along with sharpening you can turn down.
Phone tips that make the biggest difference
- Use the main camera in dim light; the ultra-wide and telephoto cameras usually have smaller sensors.
- Let Night mode finish. It combines several frames to cut noise; hold the phone still (or brace it) until the capture is done.
- Do not digitally zoom. Walk closer instead, or crop lightly later.
- Turn down sharpening and Clarity-style sliders in any filter or editing app you use.
How to Remove Grain from a Photo on a Computer
In a raw photo editor
- Open the RAW file if you have one; noise reduction works best before the image has been compressed.
- In the Detail (or Noise) panel, set Color noise reduction first, then Luminance.
- Use Detail and Contrast sub-sliders to recover texture lost to smoothing.
- Sharpen last, with a Masking value that protects smooth areas.
- Many raw editors now offer an AI denoise button that processes the whole file. It usually beats the sliders on very high ISO shots; compare the result at 100%.
- To clean only the background, apply noise reduction through a brush or mask, leaving the subject's texture alone.
In a layer-based editor
- Run a reduce-noise filter with separate strength, preserve-details, and color-noise settings.
- For heavy noise in a background or sky, duplicate the layer, apply a median or surface blur, and use a mask so it affects only those areas.
- Stack several frames. For still subjects, take 4 to 16 shots on a tripod, align them as layers, and blend them with a mean (average) stack mode. Random noise drops with every frame: four frames roughly halve it. This is what phone night modes do automatically.
Online tools on EzImgMaker
- Grainy and compressed: remove JPEG artifacts cleans blocks, halos, and mosquito noise around edges, which often come together with grain in photos that were sent through messaging apps.
- Grainy because it was brightened: if you use the Image Brightener, keep the Shadows lift moderate and add a little contrast, then reduce noise afterwards.
- Grain added by a filter: the filter remover has a Vintage and faded option that takes out added grain, light leaks, and color tints.
How Much Noise Reduction Is Too Much?
Noise reduction works by smoothing, so at high settings it smooths real detail too. The warning signs:
- Skin looks waxy or plastic, with no pores.
- Hair and eyelashes merge into soft clumps.
- Fabric, grass, and wood turn into smudgy, painted-looking patches.
- Fine text becomes unreadable.
When you see these, lower the luminance setting until some texture returns. A trace of fine, even grain looks far more natural than a perfectly smooth but waxy photo, and some photographers add a little fine grain back on purpose after strong noise reduction.


Demo: the same simulated grainy portrait processed with a very strong and a moderate noise reduction setting, shown as a 2x crop.
How to Fix Grainy Photos with AI
If you have tried the sliders and still wonder how to make grainy photos clear, AI is the next step. AI tools degrain photos differently: instead of just blurring the speckles, a trained model separates noise from detail and redraws clean texture, edges, and faces. That is why it handles heavy grain, small phone files, and old scans better than sliders, and why it is the quickest way to remove grain from image files you cannot reshoot.
- Open the AI image enhancer and upload the grainy photo (the original, not a screenshot).
- Choose Restore mode, which fixes blur, noise, and soft faces, and pick 2K or 4K output.
- Generate, then compare the result with the original at full size.
- If you also need a bigger image, run the cleaned result through Upscale mode afterwards, so the grain is not enlarged along with the photo.
The enhancer is free to try with the credits you get when you sign up, and the credit cost is shown before you start.
Check the details. AI restoration reconstructs detail rather than recovering it. Faces, small text, logos, and patterns can come out slightly different from the original, so compare them closely when accuracy matters.
Use AI to remove graininess from photo scans and old prints
Old family prints and film scans carry film grain, dust, and scanner noise, and many have been printed with a dot pattern. Match the tool to what you see:
- Film grain, scanner noise, faded detail: Restore mode in the AI image enhancer.
- A dot grid or moire from magazine and newspaper prints: descreen dissolves halftone dots; moire fix removes wavy patterns from photos of screens and fabric.
- A small, pixelated copy of an old photo: unpixelate image rebuilds detail at a larger size.
- Grain that should stay but look intentional: convert to monochrome with the black and white photo converter; even grain looks like classic film in black and white, and it removes distracting color noise.
Grainy video clips have their own tool: the video enhancer cleans noise and compression and sharpens soft footage.
How to Remove Grain from Photos Taken at Night
Night photos combine everything that causes grain: little light, high ISO, long exposures, and deep shadows that get brightened later. A few extra rules apply:
- Remove color noise first and strongly; night skies and dark streets show colored blotches more than anything else.
- Protect point lights and stars. Heavy luminance noise reduction can wipe out small stars and turn streetlights into smudges; use a mask or keep the setting moderate.
- Do not brighten the sky too much. A darker night sky hides noise and looks more natural.
- Stack or use Night mode. Several short frames averaged together beat one long, high-ISO frame.
- Try AI on the hardest shots. For a grainy night portrait or concert photo, the AI enhancer usually keeps faces cleaner than heavy slider settings.
How to Avoid Grainy Photos When Shooting
The best fix for grain is collecting more light in the first place:
- Add light. Move closer to a window, turn on room lights, or use a reflector. Even a small increase lets the camera lower its ISO.
- Keep ISO as low as the shot allows. On a camera, set an Auto ISO maximum you are happy with.
- Open the aperture (a smaller f-number) to let in more light.
- Use a slower shutter with support. A tripod, a wall, or image stabilization lets you use a longer exposure at a lower ISO for still subjects.
- Expose correctly, or slightly bright. A well-exposed shot has much less visible noise than a dark one brightened later. Just stop before the highlights clip; see how to fix overexposed photos for what happens if you go too far.
- Shoot RAW for better noise reduction later.
- Avoid digital zoom and heavy crops.
- Clean the lens. A smudged lens adds haze, which tempts you to add contrast and sharpening that bring out grain.
Typical ISO by situation:
| Situation | Typical ISO | Grain risk |
|---|---|---|
| Bright daylight | 50 to 200 | Very low |
| Shade or overcast sky | 200 to 800 | Low |
| Indoors by day | 800 to 3200 | Moderate on phones |
| Restaurants, bars, evening indoors | 3200 to 12800 | High on phones, moderate on full-frame cameras |
| Night outdoors without a tripod | 6400 and up | High, unless Night mode or stacking is used |
Adding Grain on Purpose: How Do You Add Grain in Photoshop?
Sometimes grain is the look you want: a film-style portrait, a moody street photo, or a way to make a smooth digital image feel more organic. A light grainy photo effect also hides banding in skies and makes heavy noise reduction look more natural. Apps often call it a grain or grainy filter; here is how to add it yourself with full control.
How do you add grain in Photoshop? There are two common ways:
- Raw filter method: open the raw or camera raw filter, find the Grain controls in the Effects section, and set Amount (start around 15 to 30), Size, and Roughness.
- Noise layer method: add a new layer filled with 50% gray, set its blend mode to Overlay, apply Filter → Noise → Add Noise with Gaussian distribution and Monochromatic checked (around 3 to 8%), then adjust the layer opacity. Because the grain sits on its own layer, you can mask or fade it at any time.
Most other editors have a similar Grain slider or a grainy photo filter preset. In your browser, the free sepia filter includes a Grain slider for a vintage print look, and the low quality image maker works as a quick grainy image maker for lo-fi and meme styles, with nothing uploaded.
Printing a Grainy Photo
- Smaller prints hide grain. Noise that is obvious on a 16x20 print is barely visible on a 4x6; see the 4x6 photo size guide and the photo print size guide to pick a size and crop.
- Reduce noise before you enlarge. Upscaling a grainy file enlarges the grain too; denoise first, then upscale.
- Changing the DPI value does not remove grain. Increasing the DPI sets the print size of the pixels you already have; it does not add detail or clean up noise.
- Matte paper is forgiving. It shows fine grain less than glossy paper.
Frequently Asked Questions
Can you remove grain from photos completely?
You can remove most of it. Noise reduction and AI denoising clear the speckles, but the fine detail hidden under heavy grain is partly lost, so pushing to zero grain makes surfaces look smooth and waxy. The best-looking results usually keep a trace of fine, even grain.
Why are my photos so grainy indoors and at night?
In dim light the camera has very little light to work with, so it raises the ISO (amplifies the sensor signal). That amplifies the random noise as well, and small phone sensors show it sooner than larger camera sensors. Brightening a dark photo afterwards has the same effect.
Is grain the same as noise?
Not exactly. Film grain comes from the silver crystals in film and looks even and organic. Digital noise comes from the sensor and electronics, and appears as gray speckles (luminance noise) and colored blotches (color noise). People call both of them grain, and the fixes overlap.
How do I make my iPhone photos less grainy?
Open the photo in the Photos app, tap Edit, go to Adjust, and raise Noise Reduction. Lower Sharpness and Definition if they are turned up, since they make grain stand out. For future shots, use more light, hold the phone steady so Night mode can work, and avoid digital zoom.
Can I fix grainy photos for free?
Yes. You can fix grainy photos free of charge with the noise reduction in the editors built into iPhone and most Android phones, and free desktop and mobile editors offer luminance and color noise sliders. The AI image enhancer on EzImgMaker is free to try with the credits you get when you sign up.
Why does my photo get grainier when I brighten it?
The noise was already there, hidden in the dark areas. Brightening lifts the noise together with the picture, so it becomes visible. Brighten only as much as you need, then apply noise reduction, starting with color noise.
Does sharpening fix a grainy photo?
No. Sharpening increases edge contrast, and grain is made of tiny edges, so sharpening makes it worse. Reduce noise first, then add a small amount of sharpening with masking so only real edges are sharpened.
Can AI fix grainy old photos and scans?
Yes, in most cases. AI restoration separates grain and scanning noise from real detail and redraws clean texture and faces. Because it reconstructs detail rather than recovering it, compare faces and small text with the original. For printed halftone dots from magazines or newspapers, a descreen tool works better.
Final Takeaway
Grain is noise made visible: too little light, amplified by high ISO or brightening. To fix grainy photos, correct exposure first, remove color noise, reduce luminance noise only until texture starts to suffer, and sharpen gently. If you are wondering how to make a grainy photo clear when sliders are not enough, an AI restore is the next step, especially for night shots and old scans. And for the next photo, more light beats any fix.
iPhone is a trademark of Apple Inc., Android is a trademark of Google LLC, and Photoshop is a trademark of Adobe Inc. EzImgMaker is not affiliated with these companies. Before-and-after examples in this article are demonstrations made by simulating noise on clean photos and reducing it with standard noise reduction filters.