
How to Fix Overexposed Photos: Phone, Desktop, and AI Methods
How to fix overexposed photos step by step: why pictures come out washed out, exposure correction on iPhone, Android and desktop, AI fixes, and how to avoid it.
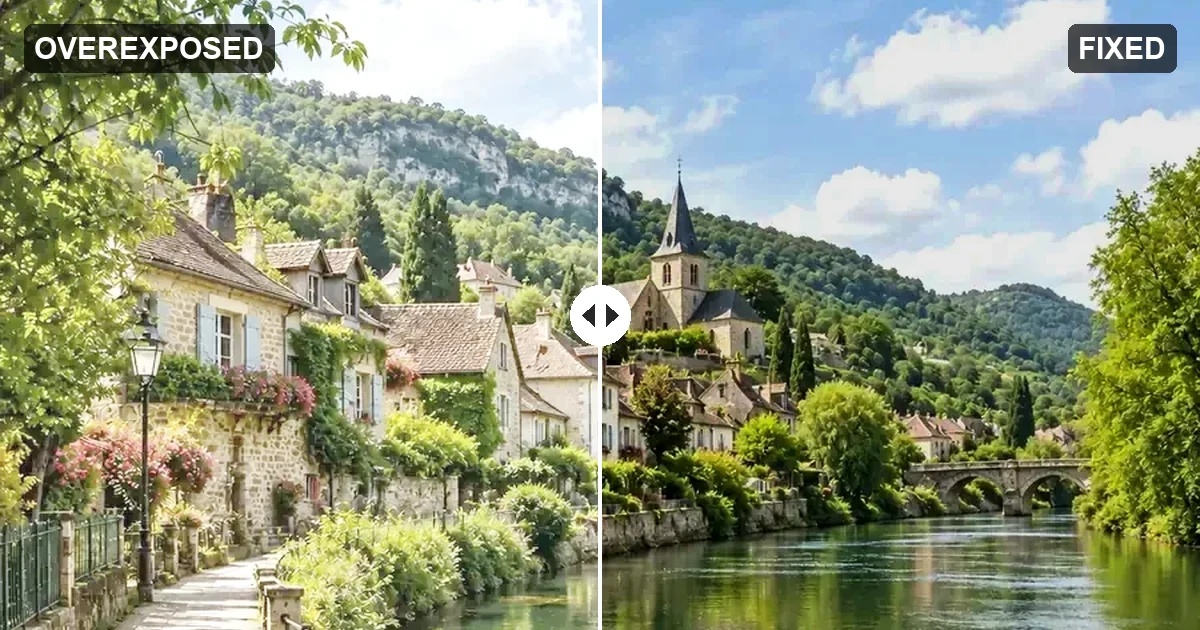
Short answer: to fix an overexposed photo, lower the exposure, pull the highlights and whites down, then bring back contrast, black point, and a little saturation. That works whenever the bright areas still hold some detail. Areas that turned pure white cannot be recovered, only toned down, cropped, disguised, or rebuilt with AI.
Most overexposed pics come from a phone that measured the wrong thing: a face against a bright sky, a white wall, or a sunlit window. This guide explains how to tell what can be saved, then walks through how to fix overexposed photos on iPhone and Android, in a desktop editor, and with AI, plus the camera habits that stop over exposed photos from happening in the first place.
What Is an Overexposed Photo?
An overexposed photograph is one where too much light reached the sensor (or film), so the image is brighter than the scene looked. The typical signs:
- The sky is white or very pale instead of blue, and clouds disappear.
- Skin looks washed out, with shiny white patches on the forehead, nose, or cheeks.
- Colors are faded and contrast is flat; blacks look gray.
- White clothing, walls, or snow lose their texture and turn into flat white shapes.
- The histogram is piled up against the right edge, often with a spike at the very end.
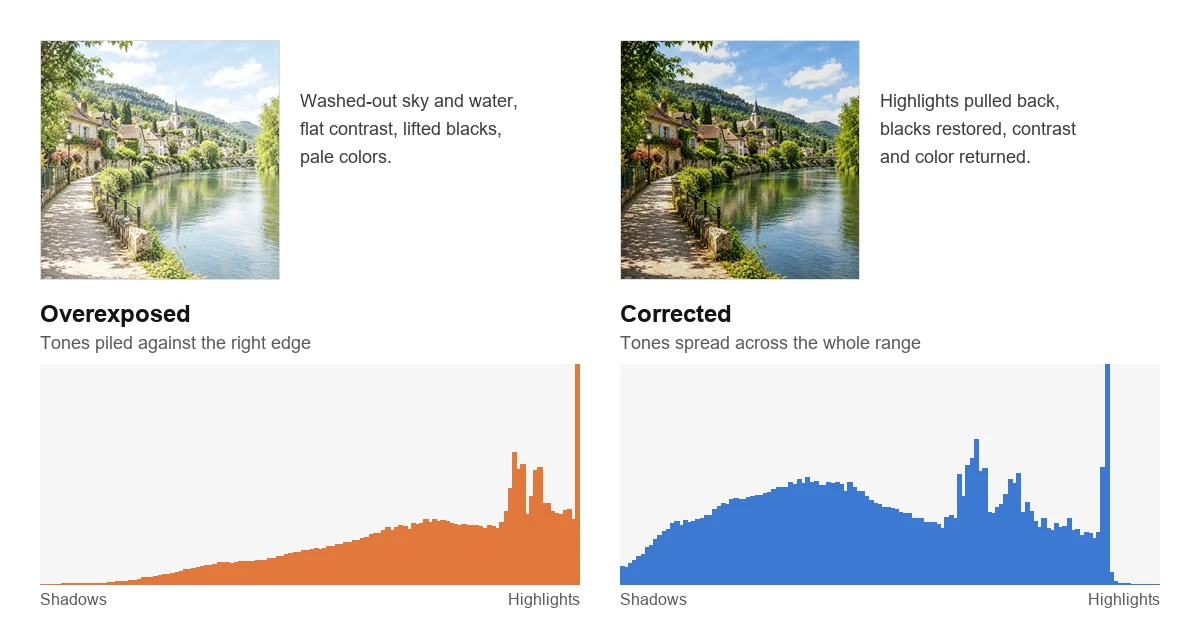
Recoverable highlights vs. clipped highlights
The single most important question is whether the bright areas still contain data. Zoom in to 100% and look at the brightest parts of the overexposed image:
| What you see | What it means | Can you fix it? |
|---|---|---|
| Very bright, but you can still see faint cloud edges, fabric texture, or skin pores | Highlights are compressed, not lost | Yes: lower highlights, whites, and exposure |
| Bright with a slight color tint | One or two color channels are clipped | Partly: tone it down, then fix the color |
| Perfectly flat white with no texture at all | Clipped highlights: no data left | Not with sliders; crop, disguise, or rebuild with AI |
| The whole photo is pale and gray, nothing is pure white | Washed out, low contrast (often haze or a filter) | Yes: contrast, black point, and dehaze do most of the work |
Your phone or editor can show this too. Many editors have a clipping warning that paints pure white areas red, and most cameras offer a highlight alert (the "blinkies") in playback.
What Causes Photo Overexposure?
Photo overexposure always comes down to the same thing: the camera captured more light than the scene needed. Here is how that usually happens.
Overexposure photography basics: the exposure triangle
Three settings control how much light a photo collects, and each one can tip a shot into overexposure:
| Setting | What makes the photo brighter | What to change when it is too bright |
|---|---|---|
| Shutter speed | A slower shutter (for example 1/30 s) | Use a faster shutter (1/500 s or faster in sun) |
| Aperture | A wider aperture (a small f-number such as f/1.8) | Close down to f/5.6, f/8, or f/11 |
| ISO | A higher ISO (800, 1600 and up) | Drop to the base ISO (100 or the lowest available) |
A handy check for bright days is the Sunny 16 rule: in direct sun at f/16, a shutter speed of about 1/ISO (1/100 s at ISO 100) gives a normal exposure.
The everyday causes
- The meter was fooled by a dark subject or a dark background. Cameras try to make the scene average out to middle gray, so a dark scene gets brightened until the light parts clip. A person under a spotlight on a dark stage is a classic case.
- You exposed for a face in front of a bright background. Tapping on a backlit face tells the phone to brighten the whole frame, and the sky or window blows out.
- Exposure compensation was left turned up. A +1 EV setting from an earlier shot carries over to the next one.
- Bright, reflective scenes. Snow, sand, water, and white walls reflect so much light that highlights clip easily, especially if you brighten the shot to keep a face from looking dark.
- Flash too close. Direct flash at arm's length makes faces pale and shiny.
- Midday sun. Harsh overhead light creates bright highlights and deep shadows at the same time, more contrast than a single exposure can hold.
- A dim screen. If your screen brightness is low (battery saver, night mode), photos look darker than they are, so you brighten them too far in the editor.
How to Fix an Overexposed Photo: The 6 Core Adjustments
Every editor, from the one built into your phone to a full desktop program, offers some version of these sliders. Work through them in this order and make small moves; it is easier to judge the result when you change one thing at a time.
- Lower Exposure (or Brightness) until the midtones look believable. Start around -0.3 to -1 stop.
- Pull Highlights down. This is the most important move. It recovers the sky, skin, and light clothing without darkening the whole photo. Try -50 to -100.
- Lower Whites (sometimes called White Point) so the brightest tones stop at light gray-white instead of blank white.
- Restore depth with Contrast and Black Point (or Blacks). Overexposed photos look flat; a little contrast and deeper blacks bring them back to life. A small Dehaze or Clarity boost helps with a hazy, washed-out look.
- Bring back color with a little Saturation or Vibrance, and adjust Warmth if skin looks pale or the sky too cyan.
- Fix what is left locally. If only the sky is too bright, use a gradient, brush, or sky mask and lower exposure and highlights in that area alone.
Starting values for each severity level:
| Adjustment | Mildly overexposed | Moderately overexposed | Strongly overexposed |
|---|---|---|---|
| Exposure | -0.3 | -0.7 | -1.0 to -1.5 |
| Highlights | -30 to -50 | -60 to -80 | -100 |
| Whites | -10 | -30 | -50 or more |
| Contrast | +5 | +10 | +15 to +25 |
| Black Point / Blacks | small increase | moderate increase | moderate increase |
| Saturation / Vibrance | +5 | +10 | +10 to +20 |
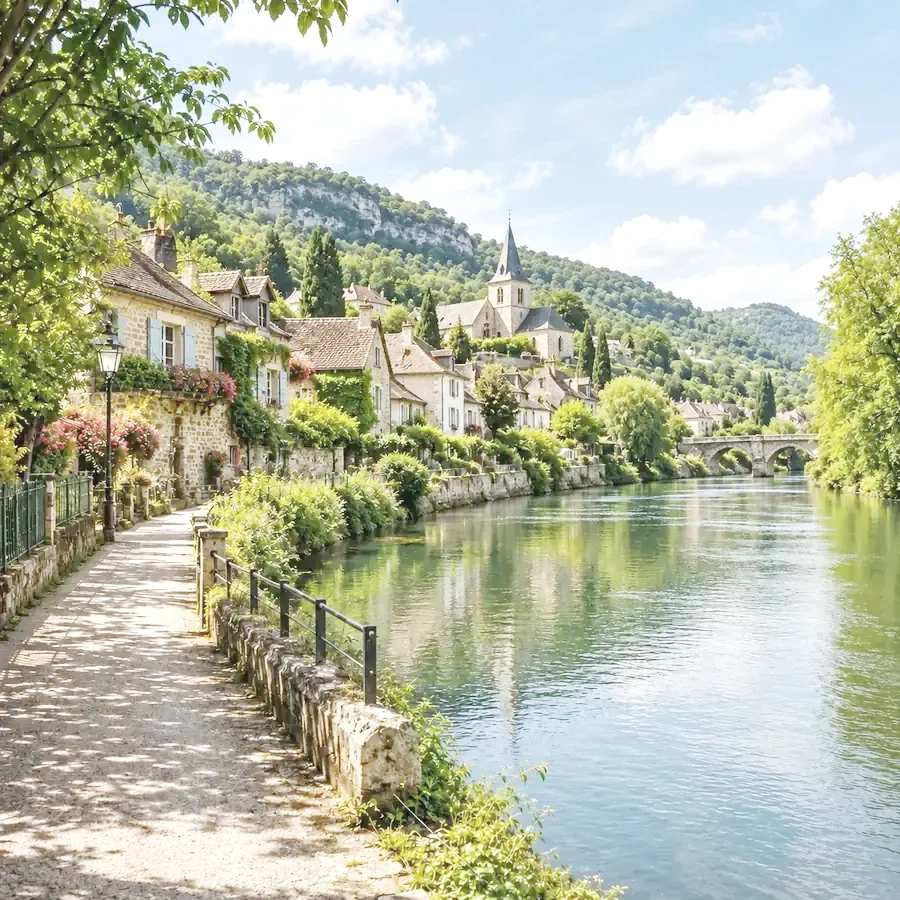
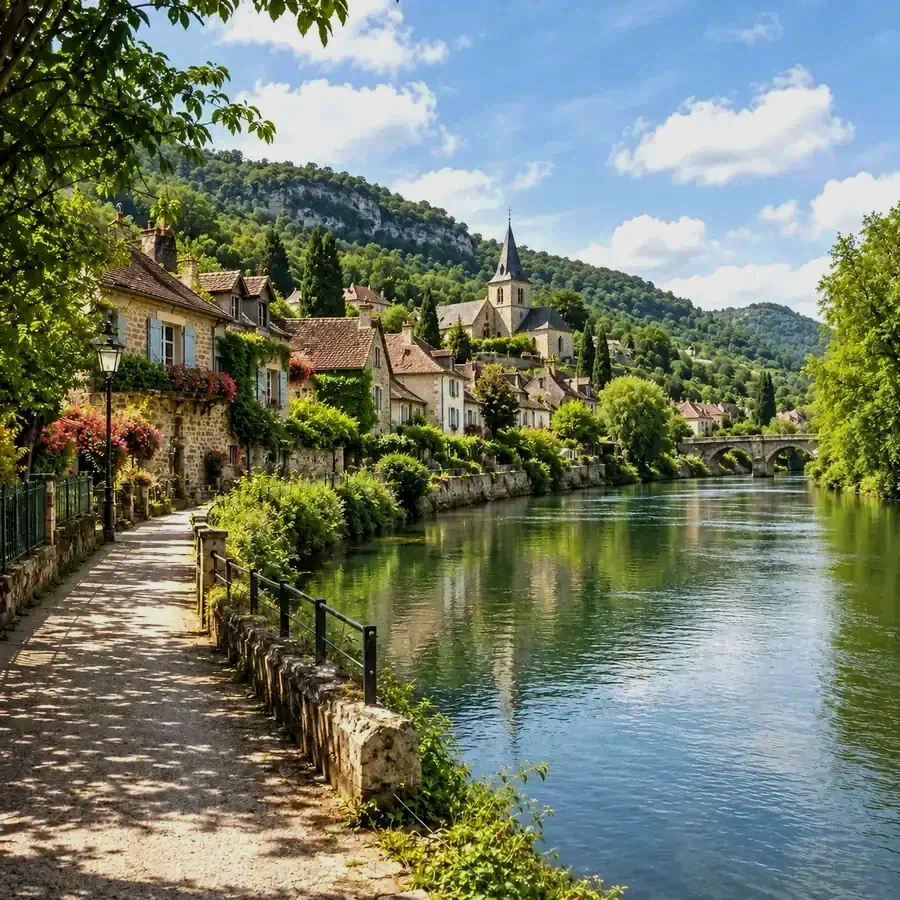
Demo: overexposure simulated on a correctly exposed photo, then corrected with lower exposure, highlights and whites, deeper blacks, and a little contrast and saturation. The brightest reflections on the water were clipped and stay bright.
How to Fix Overexposed Pictures on iPhone and Android
If you are wondering how to fix over exposed pictures without installing anything, start with the editor already on your phone. Exposure correction there is quick and free, and you can usually revert to the original later.
iPhone (Photos app)
- Open the photo and tap Edit.
- Go to Adjust.
- Lower Highlights first, then Exposure. If the photo still looks bright, lower Brightness a little.
- Raise Black Point and Contrast slightly to restore depth.
- Add a little Vibrance or Saturation, and use Warmth if skin looks pale.
- Tap Done. To start over later, open Edit again and choose Revert.
Brilliance is worth a try too: it balances bright and dark areas at the same time, though at high values it can make photos look over-processed.
Android phones
Gallery and photos apps differ between phone makers, but most have the same tools:
- Open the photo, tap Edit, and look for Adjust (sometimes called Tone or Light).
- Lower Highlights and Exposure or Brightness.
- Lower White point if it is available, and raise Black point and Contrast a little.
- Restore color with Saturation or Warmth, then save a copy.
If your built-in app has no Highlights slider, a free mobile editor with a "Tune" or "Adjust" panel, a selective brush, and a curves tool will cover everything in this guide, including darkening only the sky.
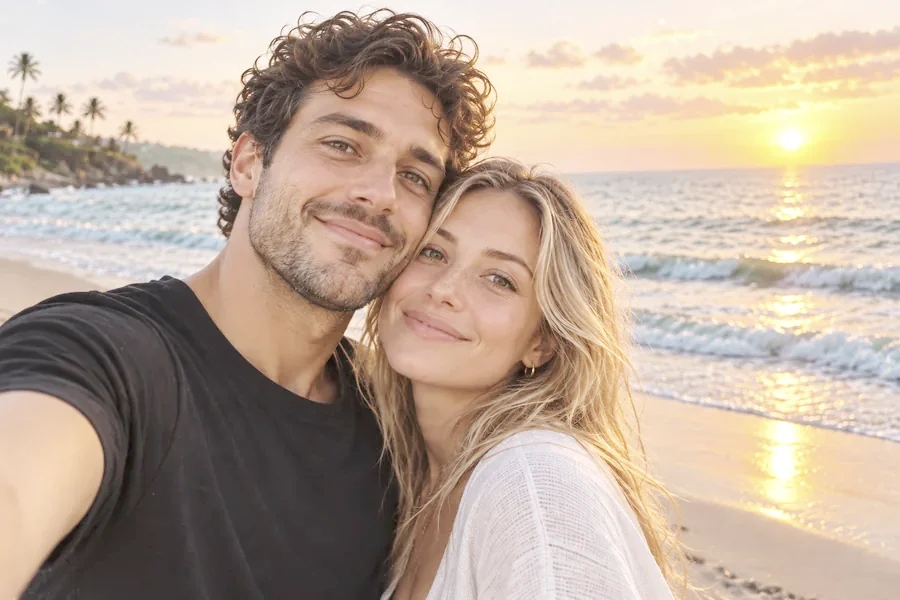
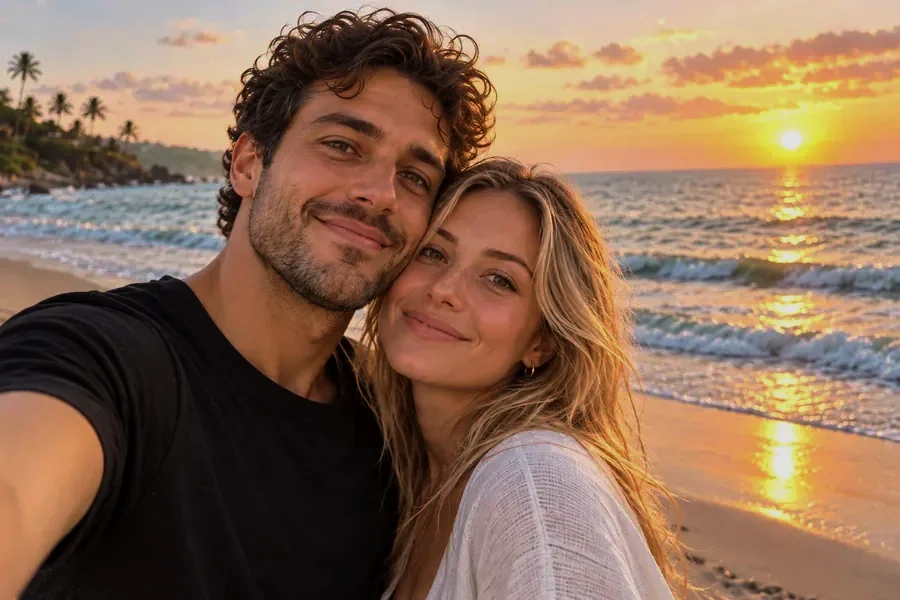
Demo: overexposure simulated on a correctly exposed selfie, then fixed with the same moves you would make in a phone editor: highlights and exposure down, black point and contrast up, a little more color.
How to Edit Overexposed Photos on a Computer
Desktop software gives you finer control, local masks, and better results on RAW files.
In a raw photo editor
- Open the original file, preferably the RAW version, not an exported JPEG or a screenshot.
- In the basic or light panel, set Highlights to -100 and see what comes back, then dial it back if the photo looks flat.
- Lower Whites until the clipping warning (usually toggled with a key or a triangle above the histogram) shows little or no red.
- Adjust Exposure for the midtones, then Contrast, Blacks, and a touch of Dehaze for depth.
- Use a sky mask or a linear gradient over a bright sky, with exposure and highlights lowered inside it.
- Fix color with Temperature, Vibrance, and, for skin, the orange hue and saturation sliders.
- If you shot a series in the same light, sync these settings across all of them, then check each frame.
In a layer-based editor
- Curves: pull the top half of the curve down to darken the highlights while keeping the shadows anchored.
- Levels: move the middle (gray) slider to the right to darken the midtones, and the left slider inward to deepen the blacks.
- Shadows/Highlights adjustment: raise the Highlights amount to compress the brightest tones.
- The Multiply trick: duplicate the layer, set the copy's blend mode to Multiply, and lower its opacity until the brightness looks right. Add a mask to apply it only to the sky or another bright area.
Free browser option
To fix overexposed photo brightness without installing anything, open the free Darken Image tool and click its Fix Overexposed preset, then fine-tune brightness, exposure (midtones), contrast, saturation, and warmth while comparing before and after. It runs in your browser, so the photo is not uploaded, and it downloads at full resolution. If you darkened too far, the Image Brightener works the other way.
How to Fix an Extremely Overexposed Photo
When large parts of the frame are blank white, sliders alone will not save it. Here is the sequence that gives the best odds:
- Find the best original. The RAW file, the original on your camera roll, or the highest-resolution copy you have, never a social media download or a screenshot.
- Push highlight recovery to the limit. Highlights -100, Whites down hard, Exposure down. RAW files sometimes rebuild detail from the one color channel that did not clip.
- Accept what is gone. Pure white areas will turn flat light gray if you darken them too much; it often looks better to leave them white and balance the rest of the photo around them.
- Pick a rescue strategy:
- Crop the blown sky or window out of the frame.
- Convert to black and white. Washed-out color is the most obvious sign of overexposure, and monochrome hides it. Try the free black and white photo converter.
- Lean into a high-key look: soft, bright, airy, with the white areas as part of the style (see below).
- Replace the sky or the window view. For property photos, the real estate photo editor has Window View and Blue Sky presets for blown-out windows and white skies.
- Rebuild the missing area with AI (see the next section), knowing that the new detail is invented.
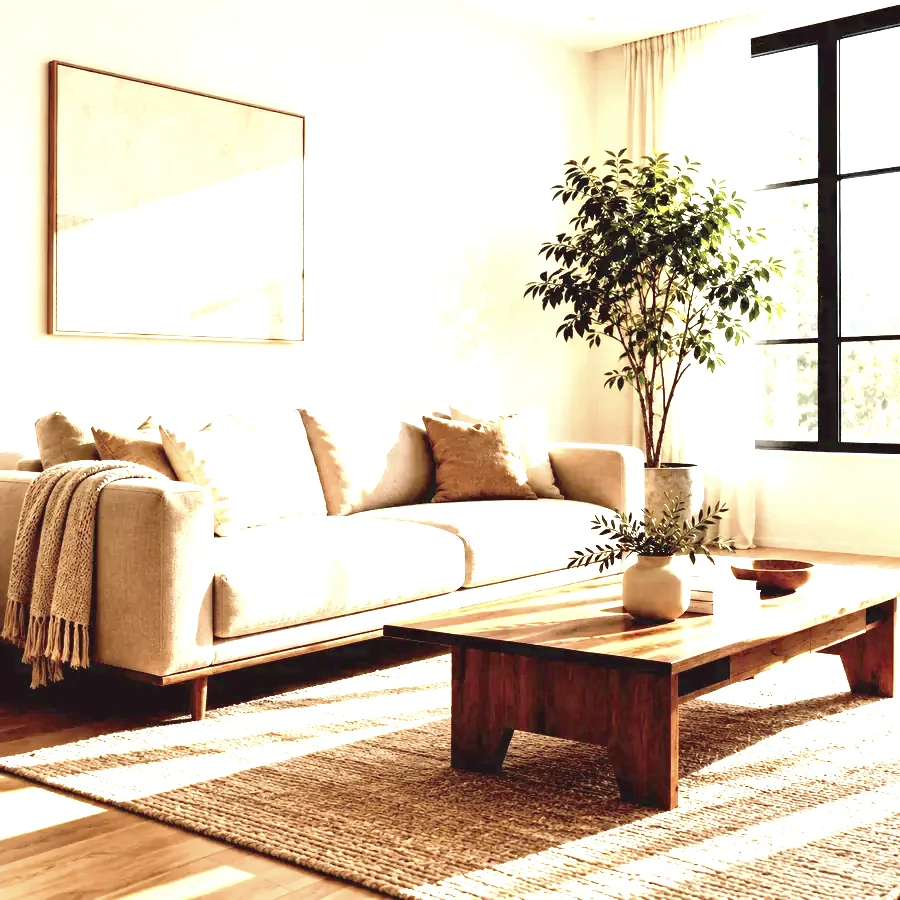
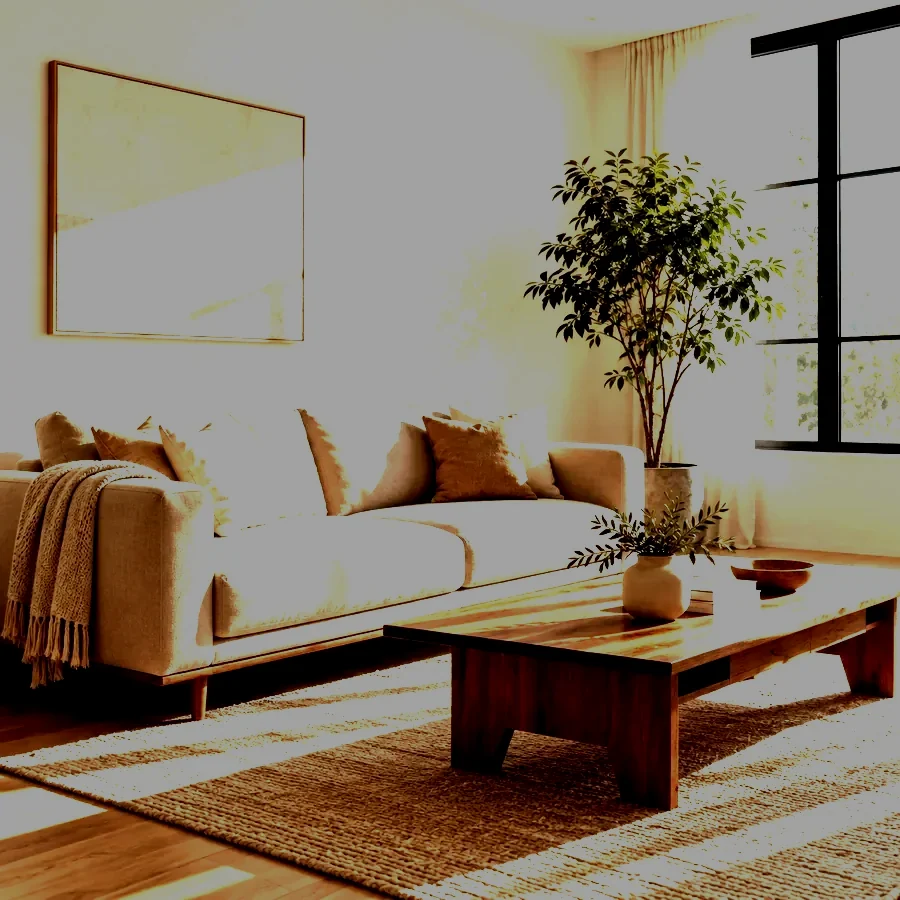
Demo: heavy overexposure simulated on a correctly exposed photo, then corrected with the same adjustments. The sofa, table, and floor come back, but the window and the sunlit patches on the wall were clipped and stay flat: no slider can restore detail that was never recorded.
Fixing Overexposed Photos with AI
AI tools are useful when manual sliders run out of road, or when you just want a quick result. Each one handles a different part of the problem:
- Soft, flat detail after the exposure fix. The AI image enhancer has a Restore mode that redraws blurry, noisy, or soft detail and faces at 2K or 4K, and an Upscale mode for enlarging the photo. Correct the exposure first, then enhance.
- Sun glare, flash hotspots, and shiny skin. The glare remover clears sun glare and lens flare, restores contrast and color in washed-out areas, and tones down flash shine on faces.
- Harsh midday light. Strong sun usually leaves hard shadows next to the blown highlights. The shadow remover softens shadows on faces, products, and rooms.
- A specific instruction. With a prompt-based editor such as the AI photo editor with text instructions, you can type something like "lower the exposure, bring back the clouds in the sky, and keep everything else the same."
- Blown windows and white skies in property photos. The real estate photo editor balances window views and replaces washed-out skies.
Be realistic about what AI can do. In areas that still hold some tone, AI rebalances real detail. In pure white areas it generates new detail that looks plausible but was never in your photo. That is fine for a social post or a family album, but not for documentation, evidence, or product photos that must show the real item. Always compare the result with the original at full size.
The AI tools on EzImgMaker are free to try with the credits you get when you sign up, and the credit cost is shown before you start.
How to Fix Overexposure Before You Take the Photo
The easiest way to fix overexposure is to prevent it. These habits work on any phone or camera:
On a phone
- Tap to focus, then lower the exposure. On iPhone, drag the sun icon next to the focus box down; on Android, use the exposure slider that appears after you tap.
- Lock exposure (press and hold on the screen) so the phone does not re-brighten when you reframe.
- Expose for the brightest important area, such as the sky or a white dress, then brighten the shadows later if needed. Shadows recover far better than clipped highlights.
- Leave HDR on (or Auto HDR) for high-contrast scenes; it blends several exposures into one.
- Turn off the flash in daylight, or step back from your subject.
- Shoot RAW in Pro mode if your phone offers it, for extra highlight headroom.
On a camera
- Turn on the histogram and the highlight alert, and check them after each new setup.
- Use exposure compensation (-0.3 to -1 EV) in bright scenes.
- Switch metering mode: spot or center-weighted metering on the subject avoids a dark background fooling the meter.
- Lower ISO first, then use a faster shutter or a smaller aperture.
- Use an ND filter when you want a wide aperture or a slow shutter in bright light.
- Bracket important shots (for example -1, 0, +1 EV) so one frame is guaranteed to hold the highlights.
In any case, shoot in softer light when you can (early morning, late afternoon, open shade), and avoid placing people directly in front of a bright window.
When Overexposed Photography Is a Style, Not a Mistake
Not every bright photo is a problem. High-key portraits, "bright and airy" wedding and food shots, and minimalist product photos are deliberately light, with white backgrounds that are meant to disappear. This kind of over exposed photography works when the subject still has detail and natural skin tones, and only the background or the light areas go white.
The difference is control: in a high-key photo the important details are intact; in an accidentally overexposed photo, the face, the sky, or the dress you cared about is the part that is lost.
Before You Print or Share
- Prints usually look darker than screens, so a mildly bright photo can print well, but clipped areas print as bare paper with no ink at all. Fix highlights before you order prints, and check the size and crop you need with the photo print size guide.
- Brightening and darkening can expose noise. If you lift the shadows after lowering exposure and they turn speckled, our guide on how to fix grainy photos covers noise reduction.
- Keep the original. Export the edited version as a copy, so you can redo the edit later with better tools or settings.
Frequently Asked Questions
Can you fix an overexposed photo?
Usually, yes. If the bright areas still show some tone or texture when you zoom in, lowering exposure, highlights, and whites brings most of it back. Areas that are pure white (clipped highlights) hold no detail, so they can only be toned down, cropped, hidden with a black-and-white conversion, or rebuilt with AI, which invents plausible detail rather than recovering the original.
Why are my photos overexposed?
The camera let in more light than the scene needed. On phones this mostly happens when you tap a dark subject in front of a bright background, when the exposure slider was left turned up, or when the flash fires too close. On cameras, a slow shutter speed, a wide aperture, a high ISO, or positive exposure compensation are the usual causes.
How do I fix overexposed pictures on my iPhone?
Open the photo in the Photos app, tap Edit, and go to Adjust. Lower Highlights first, then Exposure, then Brightness if the midtones are still too light. Raise Black Point and Contrast a little to bring back depth, and add a touch of Saturation or Vibrance. You can always revert to the original later.
Can an over exposed photo be fixed on a phone without an app?
Yes. The built-in editors on iPhone and most Android phones include exposure correction tools: exposure or brightness, highlights, contrast, and black point. They handle mild and moderate overexposure well. For local fixes such as only darkening the sky, you need an editor with a brush, gradient, or mask tool.
How do you fix an extremely overexposed photo?
Start with the original file, ideally RAW, and pull highlights and whites all the way down. Accept that pure white areas will not come back. Then choose a rescue: crop out the blown sky, convert to black and white, lean into a bright high-key look, replace the sky, or use an AI editor to rebuild the missing area and check the result closely.
Is it easier to fix overexposed or underexposed photos?
Underexposed photos are usually easier, because dark areas still contain recoverable detail, while clipped highlights contain none. The trade-off is noise: brightening a dark photo makes grain more visible. That is why many photographers expose so the brightest important area is just below clipping.
Does shooting RAW help with over exposed images?
Yes. A RAW file keeps more highlight information than a JPEG, so the Highlights and Whites sliders can often pull back skies and skin that look white in the JPEG preview. Phones with a RAW or Pro mode give you the same advantage, at the cost of larger files.
Can AI fix overexposed photos?
AI tools can balance exposure, restore color and contrast, remove glare, and redraw texture in washed-out areas. In pure white areas they generate new, plausible detail rather than recovering what was there, so check faces, text, and fine patterns before you use the result for anything that must be accurate.
Final Takeaway
Fixing overexposed images is mostly about the order of operations: highlights and whites first, then exposure, then contrast, blacks, and color, with local masks for skies and windows. Detail that is still in the file comes back; pure white does not, so for those areas choose a rescue (crop, black and white, high-key, or AI) instead of fighting the sliders. And next time, tap the bright part of the scene and nudge the exposure down before you shoot.
iPhone is a trademark of Apple Inc. Android is a trademark of Google LLC. EzImgMaker is not affiliated with either company. Before-and-after examples in this article are demonstrations made by simulating overexposure on correctly exposed photos.