
Best Topaz Video AI Settings: Remove Blockiness, Noise & Artifacts
Can Topaz Video be used to remove blockiness from video? Yes. Here are the best Topaz settings for blocky, noisy, old and anime footage, plus online tools.
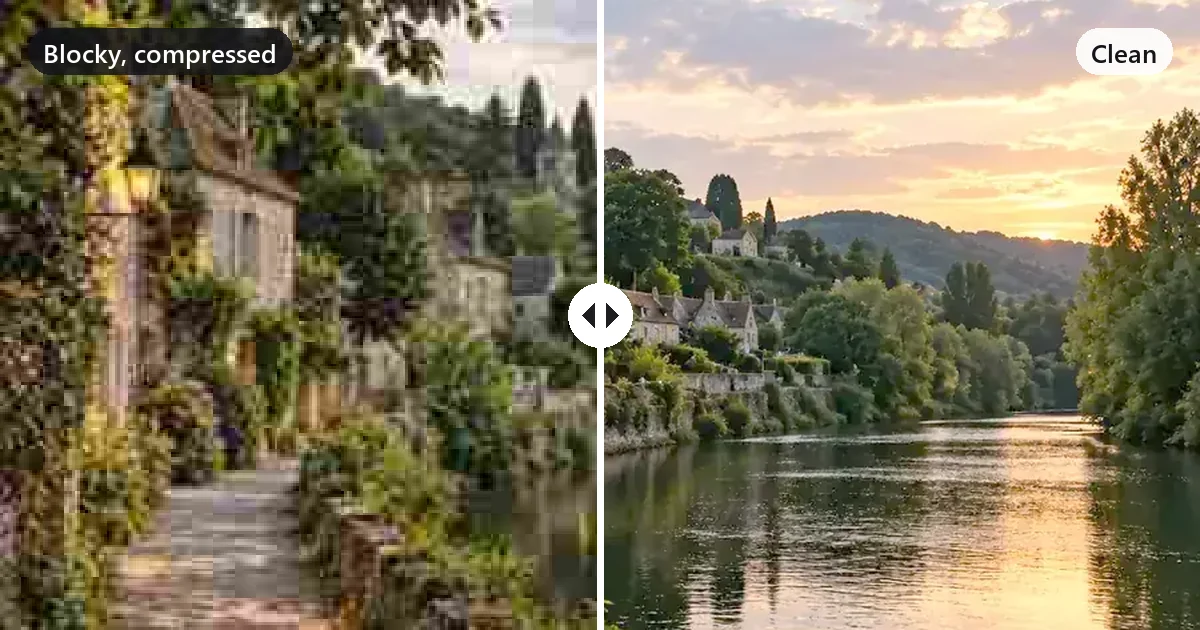
Short answer: yes, Topaz Video (formerly Topaz Video AI) can remove blockiness from video. Load the clip, choose Proteus (or Iris if faces matter), switch Advanced Tuning to Manual, press Estimate, then raise Fix Compression, keep Sharpen and Recover Detail low, preview a fast-moving section, and export at a high bitrate. That handles most streamed, downloaded, and re-encoded footage. Severely damaged clips may need a Starlight model, and no tool can perfectly restore detail that compression destroyed. If you would rather skip the settings and the GPU, online tools such as the EzImgMaker Video Enhancer do the cleanup in the cloud.
Below you will find what blockiness is, the exact Topaz settings to start from for blocky, noisy, interlaced, old, and anime footage, a model-by-model guide, export settings that keep the blocks from coming back, and online alternatives.
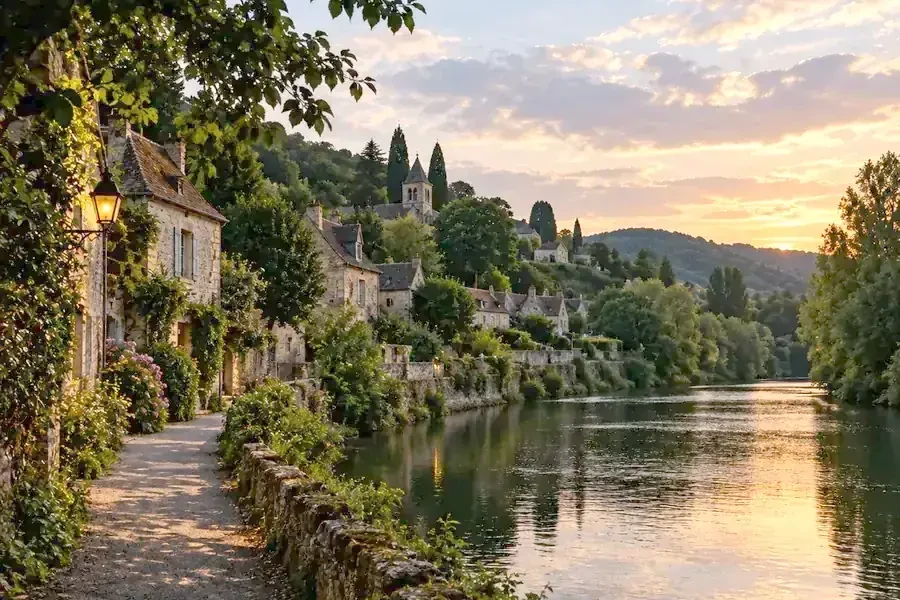

Topaz Video AI or Topaz Video? Check Your Version First
Topaz Labs renamed and restructured its video app in 2025, which is why settings guides online use slightly different names. Here is what changed, according to Topaz's own documentation:
| Topaz Video AI | Topaz Video | |
|---|---|---|
| Status | Discontinued in September 2025; v7.1.5 is the final version | Current app, still updated |
| License | Perpetual license for the version you bought; works on 2 computers | Subscription only; 1 computer at a time |
| Models | Everything up to v7.1.5 (Proteus, Iris, Nyx, Artemis, Gaia, Theia, Dione, Apollo, Chronos, Aion, Starlight Mini…) | All of those plus newer models such as Proteus Natural, Nyx XL, Gaia 2, Hyperion 2, and the Starlight series |
| Intel Macs | Supported (with at least 4 GB VRAM) | Not supported |
The settings in this guide use the current Topaz Video names and apply to Video AI 4 to 7 as well. One naming difference you will meet in older tutorials: the slider now called Fix Compression appears as Revert Compression in earlier versions, so treat the two names as the same control.
Can Topaz Video Be Used to Remove Blockiness From Video?
Yes, and it is one of the things it does best. Blockiness (also called macroblocking or pixelation) happens when a video is compressed too hard: the encoder divides each frame into small squares and, when it runs out of bits, flattens each square into a single tone. You see it most in skies, dark scenes, water, smoke, and fast motion, and it gets worse every time a video is downloaded, edited, and re-uploaded.
Topaz's enhancement models were trained on pairs of damaged and clean footage, so they can recognize block edges and rebuild smooth gradients and plausible texture. Set your expectations by the source:
- Mild to moderate blocks (a 720p or 1080p stream, a re-uploaded clip): usually cleaned up very well with Proteus or Iris.
- Heavy blocks on low-resolution video (a 360p or 480p download): much better, but fine detail is a reconstruction, and faces can look smooth or "plastic" if you push the sliders.
- Blocks plus other damage (interlacing, noise, tape artifacts): fix the right problem with the right model first, as the next section explains.
Know Your Artifact Before You Pick a Model
Most bad Topaz results come from treating the wrong problem. Match what you see to one of these artifacts (all simulated on clean images so you can recognize them), then use the suggested model.
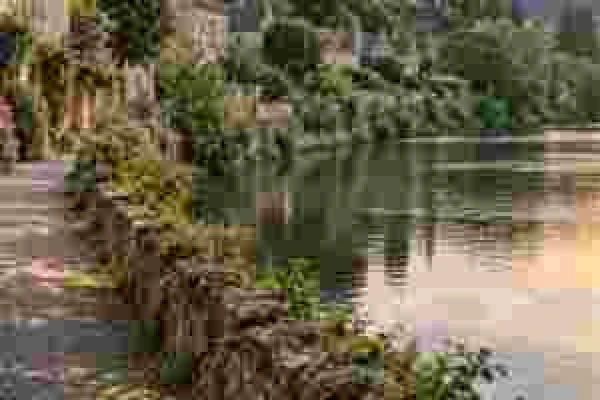
Macroblocking (blockiness)
Square blocks in flat or moving areas. Use Proteus or Iris and raise Fix Compression.
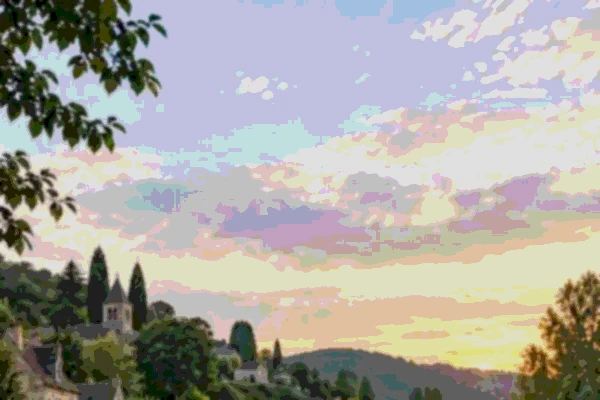
Color banding
Stepped stripes in skies and gradients. Use Proteus with moderate Fix Compression, add light grain, export at 10-bit or a high bitrate.

Noise and grain
Sandy speckles in dark footage. Use Nyx, or the Denoise filter when you want no other changes.
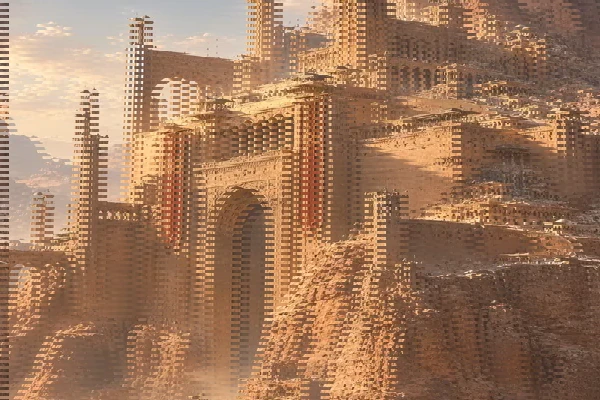
Interlacing (combing)
Comb lines on moving edges. Set Video Type to Interlaced and use Dione, Iris, or Proteus.
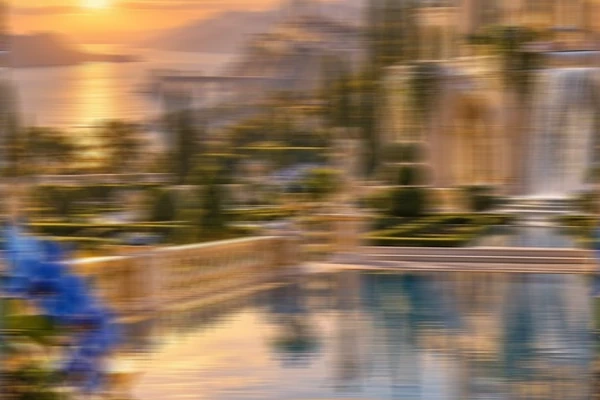
Motion blur
Smearing from a fast pan or a moving subject. Turn on Motion Deblur (the Themis model).

Halos and jagged edges
Bright outlines and stair-steps. Raise Dehalo or Anti-alias/Deblur, or try Artemis Strong Halo or Aliasing/Moire.
Using Topaz Video AI to Reduce Blocks in Videos (Step by Step)
These steps follow the current Topaz Video interface; the same controls exist in Topaz Video AI 4 to 7.
- Import the clip. Drag it into the app, click Browse Videos, or press Ctrl+I (Cmd+I on a Mac). When asked, choose Start from scratch.
- Set the Video Setup. In the Enhancement panel, pick an Output Resolution. For a first test, keep the original size or choose 2×; a blocky 480p clip rarely benefits from going straight to 4K. Then set Video Type: Progressive for almost all modern video, Interlaced for old camcorder, TV, or DVD footage with comb lines, and Interlaced Progressive for interlaced footage that was wrongly converted to progressive.
- Choose the AI model. Start with Proteus. Switch to Iris (LQ for very poor sources, MQ for medium) if the footage shows people up close.
- Switch Advanced Tuning to Manual and press Estimate. Topaz offers Automatic, Dynamic (Relative to Auto), and Manual modes. Estimate fills in automatic values that you can then adjust.
- Adjust the sliders for blockiness. Raise Fix Compression first (try 40 to 60), set Improve Detail to 10 to 25, keep Sharpen at 0 to 10, and lower Recover Detail to 0 to 10, because it mixes original pixels, blocks included, back into the result. Leave Dehalo at 0 unless you see bright outlines, and add Reduce Noise only if the clip is also grainy.
- Preview where it is hardest. Park the playhead on a fast-moving or dark section and use Frame Preview, or click Render Preview (2 seconds by default, up to 30). Compare with the original, zoom in, and adjust one slider at a time.
- Set the codec, then export. Open Codec Settings and avoid a low bitrate (see the export section below). Then use Export As, Quick Export, or Cloud Render if your computer struggles with the model.
These starting values come from Topaz's documentation and from settings shared by experienced users on the Topaz community forum. Footage varies, so always confirm with a preview.
Topaz Video AI to Remove Blockiness, Video Artifacts and Noise: Which Model?
| Model | Best for | Notes |
|---|---|---|
| Proteus | General cleanup and upscaling of low to medium quality video; blocks, noise, softness | The most adjustable model and the usual starting point; works on progressive and interlaced footage |
| Proteus Natural | A cleaner, more natural upscale that does not over-sharpen | No sliders; designed as a 2× model; reduces crunchy textures and distorted small faces |
| Iris (LQ, MQ) | Faces and heavily compressed, noisy, or degraded footage | Improve Detail is very sensitive on Iris; use small steps |
| Artemis (High, Medium, Low Quality, Medium Halo, Strong Halo, Aliasing or Moire) | One-click denoise and sharpening, haloing, jagged edges | Low Quality is the strongest cleanup, High Quality the lightest |
| Nyx (Nyx, Nyx Fast, Nyx XL) | Noise in high-resolution or low-light footage | 1× keeps the most detail; Nyx XL is slow and has no sliders |
| Denoise filter | Removing grain without any other changes | Powered by Nyx High-Fidelity; no settings |
| Rhea (Rhea, Rhea XL) | Fine, delicate detail; 4× upscales | Rhea XL is heavy on hardware |
| Gaia (High Quality, Computer-Generated) and Gaia 2 | Clean CG, animation, motion graphics | Conservative; not for heavy compression or very poor sources |
| Theia (Fine Tune Detail, Fine Tune Fidelity) | Extra detail and sharpening under manual control | Fidelity is more consistent between frames |
| Dione (DV, TV, Dehalo, Robust, Robust Dehalo) | Deinterlacing old DV, TV, and SD footage | Almost no settings besides field order and Add Noise |
| Starlight (Precise, Mini, Sharp, Fast, HQ) | Severely degraded, very low resolution footage | Diffusion models; most need cloud rendering on a Personal license |
What Each Slider Does
| Slider | What it does | For blocky footage |
|---|---|---|
| Fix Compression | Removes compression artifacts such as blocks and mosquito noise | Your main control: raise it first |
| Improve Detail | Rebuilds fine texture | Low to moderate; too high adds fake texture |
| Sharpen | Adds edge contrast | Keep low; it also sharpens leftover blocks |
| Reduce Noise | Smooths grain and noise | Only if the clip is grainy |
| Dehalo | Removes bright outlines around edges | 0 unless you see halos |
| Anti-alias/Deblur | Smooths jagged edges or reduces softness | Low; overlaps with Sharpen, so avoid pushing both |
| Recover Detail | Mixes original source detail back into the result | Low, since the original detail includes the blocks |
| Add Noise | Adds fine noise to hide over-smoothing | A little helps faces and skies look natural |
| Focus Fix | Downscales, then upscales to help out-of-focus clips (Normal or Strong) | Off unless the clip is also out of focus |
| Grain | Adds Gaussian, Silver Rich, or Grey grain (size, density, amount) | Light grain masks banding after cleanup |
Best Topaz Settings by Footage Type
Use these as starting points, then fine-tune with a preview. "Low" means roughly 0 to 15 on a slider and "moderate" roughly 20 to 40.
| Footage | Video Type | Model | Starting settings | Output |
|---|---|---|---|---|
| Blocky stream, download, or re-upload | Progressive | Proteus, Manual | Fix Compression 40 to 60, Improve Detail 10 to 25, Sharpen 0 to 10, Recover Detail 0 to 10 | Same size or 2× |
| DVD or SD (480i, 576i) | Interlaced | Dione TV, or Proteus or Iris LQ | Proteus: Fix Compression 20 to 50, Improve Detail low, Reduce Noise and Dehalo 0 to start | 1080p (the "MiniDV HD Interlaced Basic" preset is a good base) |
| VHS and analog tape | Interlaced | Dione TV or Dione Dehalo, then Iris or Nyx as a second pass | Low sliders; add a little grain back | 1080p |
| Interviews and close-up faces | Progressive | Iris MQ (LQ if very poor) | Improve Detail low, Sharpen 0 to 5, Fix Compression moderate | 2× |
| Low-light, noisy footage | Progressive | Nyx (1×), or the Denoise filter | Reduce Noise to taste, Recover Detail low, Sharpen minimal | Same size, then upscale |
| Old 8 mm or 16 mm film | Progressive | Film 4K Light, Medium, or Strong preset | Presets combine Proteus or Artemis with a Nyx or Proteus second pass, plus stabilization | 4K |
| Clean 1080p to 4K | Progressive | Proteus Natural, Rhea, or Gaia HQ (the "4K" preset uses Proteus) | Leave sliders near Auto | 4K |
| Very damaged, very low resolution | Progressive or Interlaced | Starlight Mini or Starlight Sharp | No manual sliders; slow and often cloud-rendered | 1080p |
Second pass enhancement. Topaz lets you stack two Enhancement filters. Topaz's own presets and documentation suggest pairings such as Proteus followed by Nyx, Nyx followed by Iris for a hint of extra detail, and Proteus followed by Nyx XL. For blocky footage, a common approach is to clean up first (Proteus with Fix Compression) and add detail second, gently.
Topaz Settings for Anime Edits
Anime has flat colors, clean line art, and motion animated "on twos" or "on threes", so it needs different settings from live action. For AMVs and anime edits:
- Pick an animation-friendly model. Gaia CG is subtle and preserves line work; Gaia 2 is built for traditional animation, motion graphics, and stop motion, works frame by frame, has no settings, and gives its best results at 2× and above. If the source is a blocky stream rip, use Proteus with Sharpen at 0, Improve Detail low, and moderate Fix Compression, or Artemis Aliasing or Moire for jagged edges.
- Clean up before Gaia 2. Topaz notes that Gaia 2 is not a restoration model: deinterlace interlaced sources first and denoise heavy grain first.
- Add smoothness only if you want it. Turn on Frame Interpolation and set the frame rate (the built-in "60 FPS" preset uses Chronos Fast). Apollo handles non-linear motion and exact 2×, 4×, or 8× frame counts; Chronos is a good general option. Try Replace Duplicate Frames to fill the held frames typical of anime, and raise Sensitivity carefully, because a high value can remove frames that only look similar.
- Watch fast action. Interpolation relies on motion estimation, so big jumps between frames (impact frames, fast cuts) can warp. Preview the busiest seconds.
- Re-add your audio. Frame interpolation removes the audio track, so put your music back in your editor.
For anime stills, thumbnails, and wallpapers, the Anime Upscaler enlarges images 2×, 4×, or to 4K without the video workflow.
Export Settings That Keep Blocks From Coming Back
Perfect enhancement settings are wasted if the export compresses the video again.
- Codec: H.264 is Topaz's default and fine for most outputs up to 4K. H.265 gives smaller files at the same quality, and ProRes is better if you will keep editing the clip.
- Bitrate: do not starve it. If the export looks worse than the preview, a low bitrate is the first suspect.
- Bit depth: a 10-bit codec (or light grain) helps prevent banding in skies and gradients.
- Resolution: upscale to a size your source can justify. Two steps of 2× usually look better than one huge jump, and a 480p clip rarely needs to be 4K.
Here is how far apart common resolutions really are; tap a box to compare it with 480p.
For more on choosing an output size, see 1080p vs 4K and what 4K resolution is.
Common Topaz Mistakes
- Over-sharpening. High Sharpen or Improve Detail gives a crunchy, plastic look and outlines leftover blocks. When in doubt, lower it.
- Wrong Video Type. Running a progressive model on interlaced footage leaves comb lines; check for them first.
- Recover Detail too high on blocky sources. It blends the original blocks back in.
- Judging from one still frame. Motion reveals flicker and shimmer that a single frame hides.
- Huge upscales of tiny sources. More pixels do not mean more detail.
- Using too many filters. Topaz recommends a maximum of two filters per file for faster performance; each one adds render time.
What You Need to Run Topaz Video
Topaz Video is a desktop app for Windows and Mac. It renders locally on your GPU (Intel Macs are no longer supported) and offers Cloud Render as an option for heavy models or long clips. On a Personal license, most Starlight models (Mini, Sharp, HQ, Fast 2) require cloud rendering, while Starlight Precise 2.5 can run locally on supported Nvidia hardware.
Pricing (as of October 2026): Topaz Video Personal costs US$299 a year (about US$25 a month), US$39 a month with an annual commitment, or US$59 month to month; it is also included in Topaz Studio (US$399 a year) with Topaz Photo and Gigapixel. Topaz also sells Topaz for Web Video, a browser-based plan with monthly cloud video credits. Check the official Topaz pricing page for current prices.
Online Alternatives to Topaz Video AI
If you do not have a strong GPU, do not want to install a desktop app, or simply want a good result without learning a dozen sliders, an online enhancer is the faster route. EzImgMaker's video tools run in the cloud and take an MP4 or MOV up to 50 MB and 30 seconds:
| Tool | What it does | Settings |
|---|---|---|
| Video Enhancer | Cleans up compression, noise, and softness, optionally enlarging the video | Enhance only (1×), enhance + 2×, or enhance + 4× |
| Video Upscaler | Increases resolution, for example 540p to 1080p or 1080p to 4K | 2× or 4× |
| Unblur Video | Sharpens soft, out-of-focus, or pixelated clips | Same size, 2×, or 4× |
| HD Video Converter | Brings old SD clips up to HD | 2× or 4× |
There are no manual sliders: you pick the factor, compare the result with the original, and download. That is less control than Topaz, but nothing to install and no GPU needed. All are free to try with the credits you get when you sign up. For still images with the same problem, use Remove JPEG Artifacts or Denoise Image, and see how to fix grainy photos for noise.
Frequently Asked Questions
Can Topaz Video be used to remove blockiness from video?
Yes. Topaz Video (and the older Topaz Video AI) can reduce blockiness, the square macroblocks that low-bitrate compression leaves in streamed, downloaded, or re-encoded video. Use Proteus or Iris in Manual mode, raise Fix Compression, keep Sharpen and Recover Detail low, preview a fast-moving section, and export at a high bitrate so the blocks do not come back. Very damaged footage may need a Starlight model, and detail that was completely destroyed cannot be recovered exactly.
What are the best Topaz settings for blocky video?
A good starting point for blocky 480p to 1080p footage is Proteus in Manual mode with Fix Compression around 40 to 60, Improve Detail 10 to 25, Sharpen 0 to 10, Reduce Noise 0 to 15, Dehalo 0, Anti-alias/Deblur 0 to 15, and Recover Detail low (0 to 10). Output at 1× or 2× and preview before rendering. Every clip is different, so treat these as starting values, not fixed rules.
Which Topaz model is best for compression artifacts?
Proteus is the go-to general model and the most adjustable. Iris (LQ or MQ) is best when faces matter or the footage is heavily compressed, Artemis Low or Medium Quality is a quick one-click option, and Proteus Natural gives a gentler, less over-sharpened result. For severely degraded clips, the diffusion-based Starlight models go furthest but are slower and often run in the cloud.
What are the best Topaz settings for an anime edit?
For upscaling, start with Gaia CG (subtle, preserves line work) or Gaia 2 for traditional 2D animation, and switch to Proteus with Sharpen at 0 and low Improve Detail if the source is heavily compressed. For smoother motion, enable Frame Interpolation with Chronos or Apollo, try Replace Duplicate Frames, and preview fast action for warping. Interpolation removes the audio track, so add your music back in your editor.
Is Topaz Video AI discontinued?
Yes. Topaz Labs discontinued the perpetual-license Topaz Video AI in September 2025; version 7.1.5 is the final release and still works for people who own it. Its successor, Topaz Video, is subscription-only, keeps the same core models (Proteus, Iris, Nyx, Artemis, Gaia, Theia, Apollo, Chronos, Aion and more), and adds newer ones such as Proteus Natural, Nyx XL, Gaia 2, and the Starlight series.
Why does my Topaz export still look blocky?
The three usual causes are a low export bitrate that re-compresses the clean result, a high Recover Detail value that mixes the original blocky pixels back in, and an output resolution far larger than the source can support. Raise the bitrate or use a high-quality codec, lower Recover Detail, and upscale in smaller steps.
How much does Topaz Video cost?
As of October 2026, Topaz Video Personal costs US$299 a year (about US$25 a month), US$39 a month with an annual commitment, or US$59 month to month, and it is included in the Topaz Studio bundle at US$399 a year. Topaz also sells a browser-based Topaz for Web Video plan. Check topazlabs.com/pricing for current prices.
Is there an online alternative to Topaz Video AI?
Yes. EzImgMaker's Video Upscaler, Video Enhancer, and Unblur Video run in the cloud, so you need no GPU and no settings: upload an MP4 or MOV (up to 50 MB and 30 seconds) and choose the enhancement or upscale factor. They are free to try with the credits you get when you sign up. Topaz itself also offers a browser version, Topaz for Web Video.
Summary
Topaz Video is one of the most capable tools for removing blockiness and other compression artifacts, provided you treat the right problem with the right model. Start with Proteus in Manual mode, lead with Fix Compression, keep Sharpen and Recover Detail low, preview the hardest section, and export at a high bitrate. Use Iris for faces, Nyx for noise, Dione for interlaced footage, Gaia and interpolation for anime edits, and Starlight for the truly hopeless clips. If you would rather skip the settings and the hardware, try the Video Enhancer, Video Upscaler, or Unblur Video online.
Topaz Labs, Topaz Video, Topaz Video AI, and the model names mentioned are trademarks of Topaz Labs. EzImgMaker is not affiliated with Topaz Labs. Model names, interface labels, and prices were checked against Topaz's official documentation and pricing page in October 2026; slider starting values combine that documentation with settings shared on the Topaz community forum and are not official recommendations. All artifact images and the comparison slider are simulations made from EzImgMaker's own images, not Topaz outputs or screenshots.