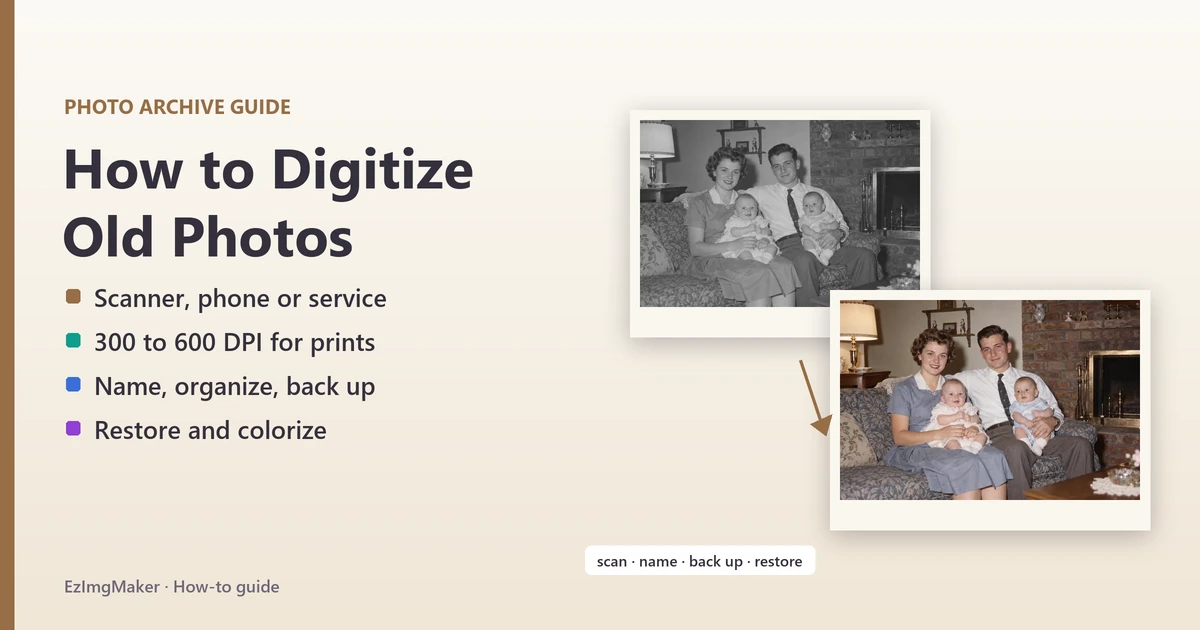
Short answer: to digitize old photos at home, sort and clean the prints, then capture them with a flatbed scanner at 300 to 600 DPI (the most detail), a phone scanning app such as Google PhotoScan (the fastest free option), or a mail-in scanning service (best for thousands of prints, slides or negatives). Save the masters as high-quality JPG or TIFF, name them by date, and back them up in at least two places. Once the photos are digital, you can restore fading, add color and print fresh copies.
Whether you call it digitizing, scanning or converting photos to digital pictures, the steps are the same. This guide answers how do you digitize photos, how to digitize pictures of any size and how to make photos digital without losing quality: each method step by step, the right DPI and file format, how to organize and back up a scanned collection, and how to repair old scanned photos with AI.
The Best Way to Digitize Photos: 4 Methods Compared
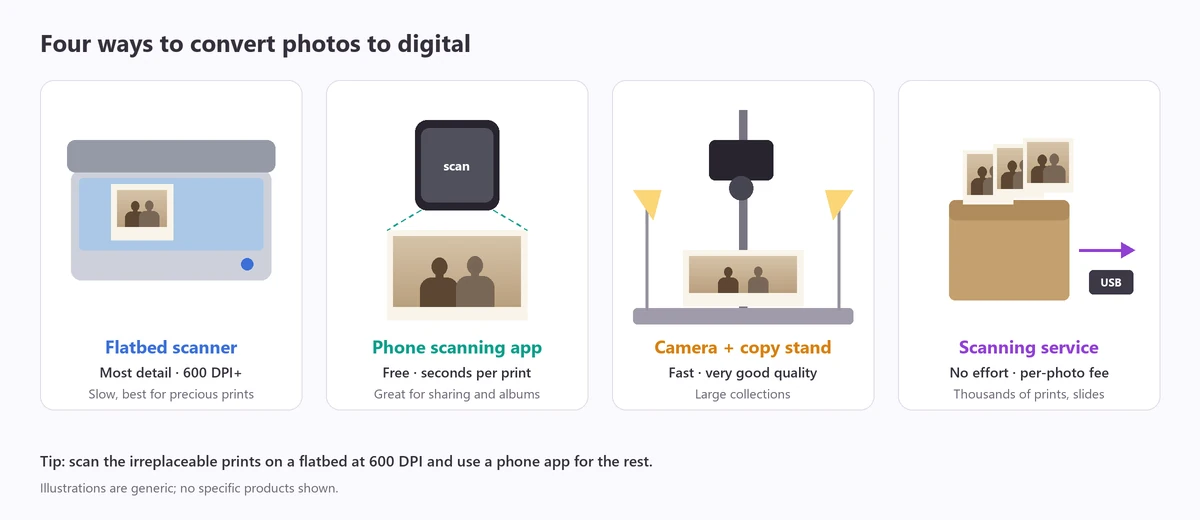
There is no single best way to digitize pictures; it depends on how many you have, how much they matter and how much time you want to spend. Whether you want to convert pics to digital for a slideshow, convert old pictures to digital for a family archive or convert photographs to digital for reprints, here is how the options compare:
| Method | Best for | Quality | Speed | Cost |
|---|---|---|---|---|
| Flatbed scanner | Precious prints, enlargements, archival masters | Excellent (600 DPI and up) | Slow: about 1 to 2 minutes per scan | A scanner, or a borrowed one |
| Phone scanning app | Quick sharing, albums you cannot take apart | Good for screens and small prints | Fast: seconds per print | Free |
| Camera on a copy stand | Large collections, fragile albums | Very good with a good lens | Fast once set up | Camera, tripod, two lamps |
| Scanning service | Thousands of prints, slides and negatives | Very good, consistent | Days to weeks | Per photo, plus shipping |
Our recommendation: scan the irreplaceable photos (portraits, weddings, one-of-a-kind prints) on a flatbed at 600 DPI, and use a phone app for everything else. That is the easiest way to digitize photos without spending weeks on it.
You will also see compact “photo to digital converter” gadgets for sale. These picture to digital converter boxes (sometimes listed as a digitizer photo scanner) feed prints or slides past a small sensor. They are quick and simple, but most capture less detail than a flatbed scanner at 600 DPI, so check the real optical resolution before you buy one.
Before You Start: Sort, Clean and Label
A little preparation makes digitizing photos at home much faster. If you are wondering where to begin to digitize my photos (or your parents’ shoebox), start here:
- Sort first. Group prints by decade, event or family branch, and pull out duplicates and blurry shots you do not need. Sorting on paper is far easier than renaming hundreds of files later.
- Handle prints by the edges, ideally with cotton or nitrile gloves, so you do not leave fingerprints.
- Clean gently. Brush off dust with a soft brush or a rubber air blower, or wipe lightly with a dry microfiber cloth. Never use water, tissues or cleaning sprays on prints.
- Leave stuck photos where they are. Prints glued into old “magnetic” albums can tear; scan the whole page instead and crop later.
- Note what is written on the back. Names, dates and places are priceless; plan to scan the back too.
- Clean the scanner glass or your phone lens. A single hair shows up on every scan.
How to Digitize Photos With a Flatbed Scanner
A flatbed scanner gives the most detail and the most accurate color, which matters if you want to reprint or enlarge old photos. Here is how to digitize a photo step by step (the same steps work to digitize a picture, a postcard or a letter). This is also the best way to scan old photos to digital files you can enlarge, and to scan photographs to digital masters for a family archive:
- Install the scanner’s software (or use the built-in Windows Scan or macOS Image Capture app) and open the preview.
- Place the print face down in a corner of the glass, square to the edges. You can scan several small prints at once and crop them apart later; leave a small gap between them.
- Choose the resolution: 600 DPI for most prints, 1200 DPI for wallet-size or smaller prints (see the table below).
- Choose color mode, even for black-and-white photos. Color captures the warm tones of sepia prints and gives restoration tools more to work with.
- Turn off automatic fixes such as dust removal, sharpening and color restoration for the master scan. You can always fix a copy later, but you cannot undo processing baked into the master.
- Preview, crop to the photo and scan.
- Save as TIFF or maximum-quality JPG, with a date-based file name.
- Scan the back if it has writing, and save it with the same name plus “-back.”
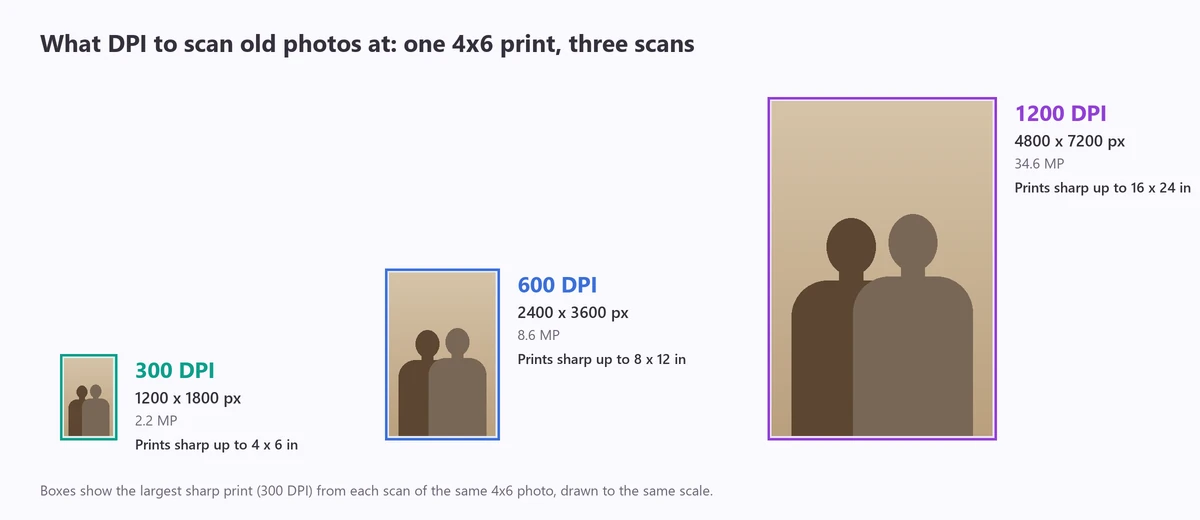
What DPI should you scan old photos at?
DPI (dots per inch) decides how many pixels you capture from each inch of the print, and therefore how large you can print the file later. The Library of Congress suggests 300 DPI for 4x6 and 5x7 prints and 400 to 600 DPI if you plan to enlarge them:
| What you are scanning | Recommended DPI | Why |
|---|---|---|
| 4x6 and 5x7 prints, to view and share | 300 to 600 | 300 DPI matches the original size; 600 leaves room to crop and enlarge |
| Prints you want to enlarge (8x10 and up) | 600 | Doubles the printable size of a 300 DPI scan |
| Wallet-size and small prints | 1200 | Small originals need more pixels per inch to be useful |
| Documents, letters and the backs of prints | 300 | Plenty for readable text |
| 35 mm slides and negatives | 2000 to 4000 (about 1900 at minimum) | The original is tiny, about 1 x 1.5 inches |
| Magazine or newspaper photos | 600, then descreen | Printed dots cause moiré patterns |
JPG or TIFF?
- TIFF is lossless: nothing is thrown away, which makes it the archival favorite, but files are big (a 4x6 at 600 DPI is about 25 to 50 MB).
- JPG at high quality looks the same to the eye at a fraction of the size, and every device can open it. The Library of Congress suggests medium-quality JPG for color photos you only want to view, and high-quality JPG if you may reprint them.
- A practical setup: keep a TIFF or maximum-quality JPG master, and make smaller JPG copies for sharing. Never keep re-saving the same JPG, because each save loses a little quality.
How to Digitize a Photo With Your Phone
Phones are the easiest way to convert pictures to digital, and the quality is good enough for sharing, screens and small reprints. If you want to convert photos to digital at home this afternoon, start here: converting pictures to digital with a phone takes seconds per print. You have three options:
- Google PhotoScan (free, iOS and Android): it photographs the print from four angles and stitches them into one glare-free image, then crops and straightens it. Ideal for glossy prints and photos stuck in albums.
- Photomyne (free core features, paid extras): detects several prints in one shot and crops each one, and lets you add names, dates and voice notes.
- Your normal camera app: works well if you control the light, as below.
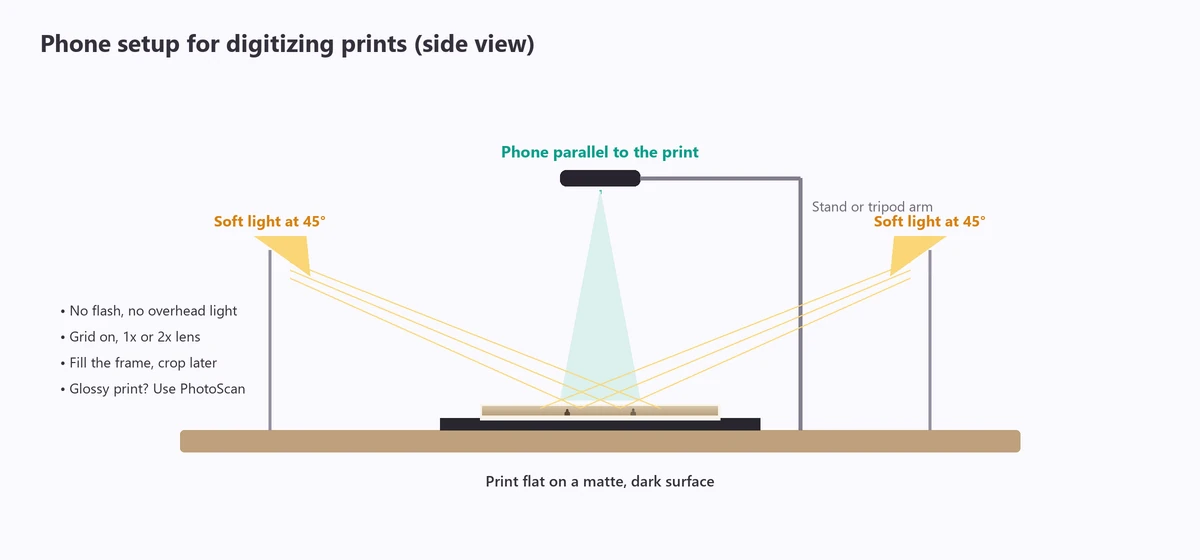
- Lay the print flat on a matte, dark surface. Put a sheet of clean glass on top only if the print curls, and watch for reflections.
- Light it evenly from both sides at about 45 degrees, or next to a window on an overcast day. Turn off overhead lights, which cause glare on glossy prints.
- Hold the phone parallel to the print, directly above it, ideally on a stand. Tilted shots turn rectangles into trapezoids.
- Turn off the flash and turn on the grid. Use the 1x or 2x lens, not the ultra-wide, and fill the frame with the photo.
- Tap to focus, take the shot, then crop and straighten. For photos you will print, take the shot at your phone’s highest resolution.
Digitizing With a Camera and Copy Stand
If you have hundreds of prints and a camera with a macro or standard lens, a copy stand (or a tripod with a horizontal arm) is the fastest high-quality method. Mount the camera pointing straight down, light the print with two lamps at 45 degrees, set a low ISO and an aperture around f/8, and use a remote or timer. Once everything is set, you only swap prints and press the shutter, which can be several times faster than scanning.
Using a Photo Scanning Service
When the boxes run into the thousands, or you have slides, negatives and film reels, a service can be worth the money for converting old photos to digital in bulk. You mail your prints, the lab scans them to a consistent standard and returns the originals with digital files (usually on a download link, a USB drive or a disc).
- Mail-in services such as DigMyPics (often typed “digmypix”), ScanCafe and Legacybox handle prints, slides and negatives. Reviews have quoted roughly 39 cents to about a dollar per print at DigMyPics depending on resolution, but prices change, so compare current rates, resolutions and shipping.
- Local options: many photo labs, camera shops and some pharmacies and big-box stores scan prints and film in store or send them out.
- Before you ship: scan or photograph the most precious prints yourself first, number the envelopes, and use tracked shipping. Ask what DPI and format you get, and whether the service needs to remove photos from albums.
How to Name and Organize Scanned Photos
A consistent naming system turns a folder of old scanned photos into a family archive you can actually search. Put the date first (year-month-day) so files sort in order, then the event and the people:
File names
1985-07-14_beach_grandma-rose_001.jpg
1985-07-14_beach_grandma-rose_001-back.jpg
1972-12_christmas_parents-house_004.tif
1960s_wedding_rose-and-john_012.jpg
Folders
Family Photos / 1960s / 1964 Rose and John wedding
Family Photos / 1980s / 1985 Summer beach trip
Family Photos / Undated / Portraits
Family Photos / Slides / 1978 Italy trip
Captions
Rose (left) and her sister Anna, Brighton beach, July 1985
Grandpa John in front of the farmhouse, about 1955 (date guessed)
Christmas at Mom and Dad’s house, 1972: Paul, Lisa, baby Kate
- Unknown dates: use the decade (1960s) or a best guess with “about” in the caption.
- Add captions and names to the file’s description field in your photo app; the information travels with the file.
- Keep scans of the back next to the front, with the same name plus “-back.”
How to Back Up Your Digitized Photos
Digital files only protect your memories if they survive a broken laptop. Use the 3-2-1 rule:
- 3 copies of every file (the working copy plus two backups),
- on 2 different kinds of storage (for example a computer and an external drive),
- with 1 copy off-site (a cloud photo service, or a drive kept at a relative’s house).
The Library of Congress recommends keeping copies in different locations, as far apart as practical, and moving the collection to current storage every five to seven years so it never gets stuck on an old format.
Restore, Colorize and Reprint
Once your photos are digital, you can do things the prints never could. Always work on a copy and keep the original scan untouched.
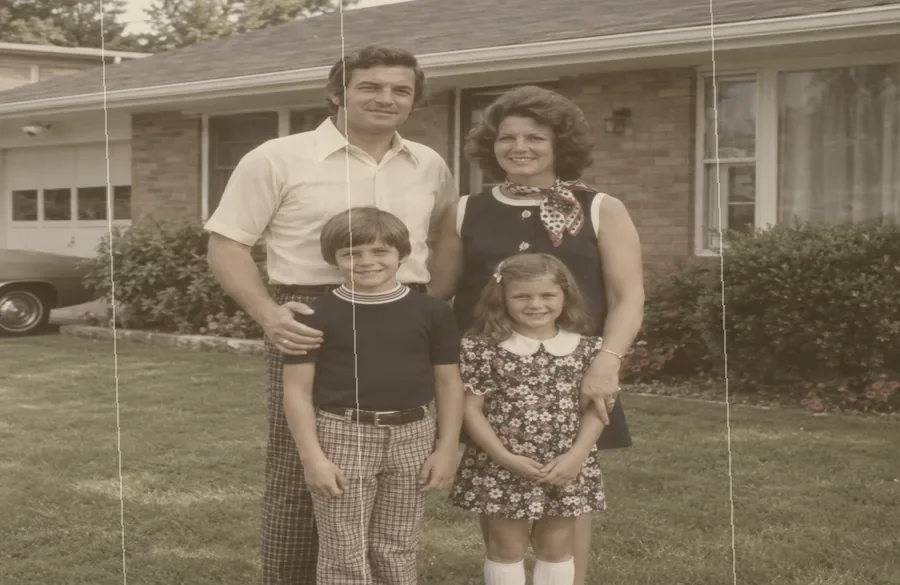
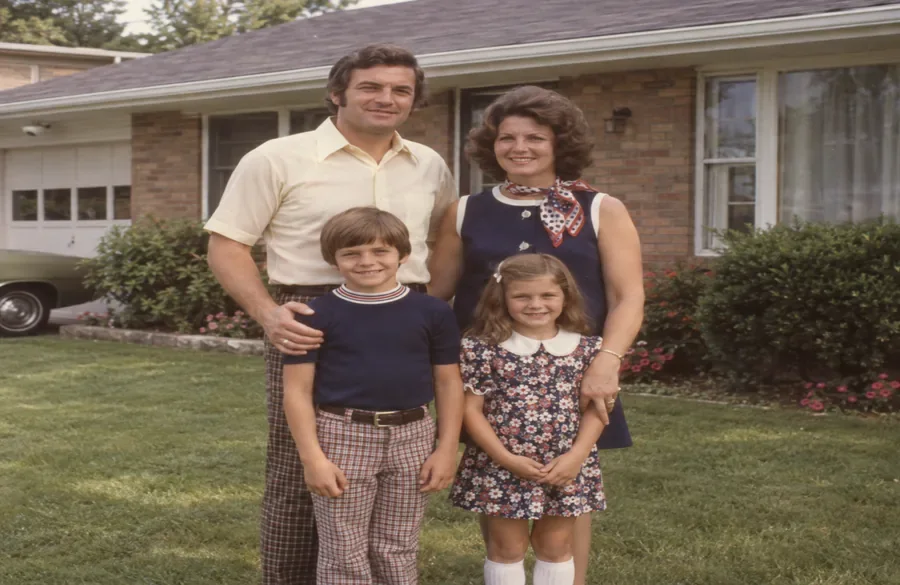
Repair fading and blur. The image enhancer restores faded color, sharpens soft faces and recovers detail in old scans:
Add natural color to black-and-white photos. Colorize image adds realistic color while keeping every face and detail of the original:
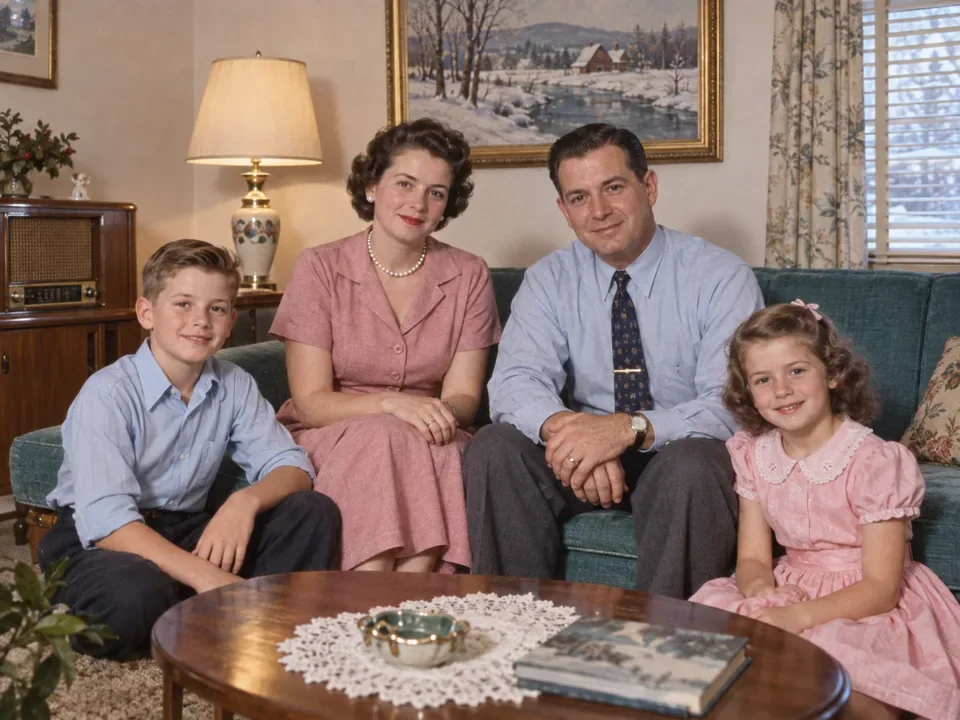
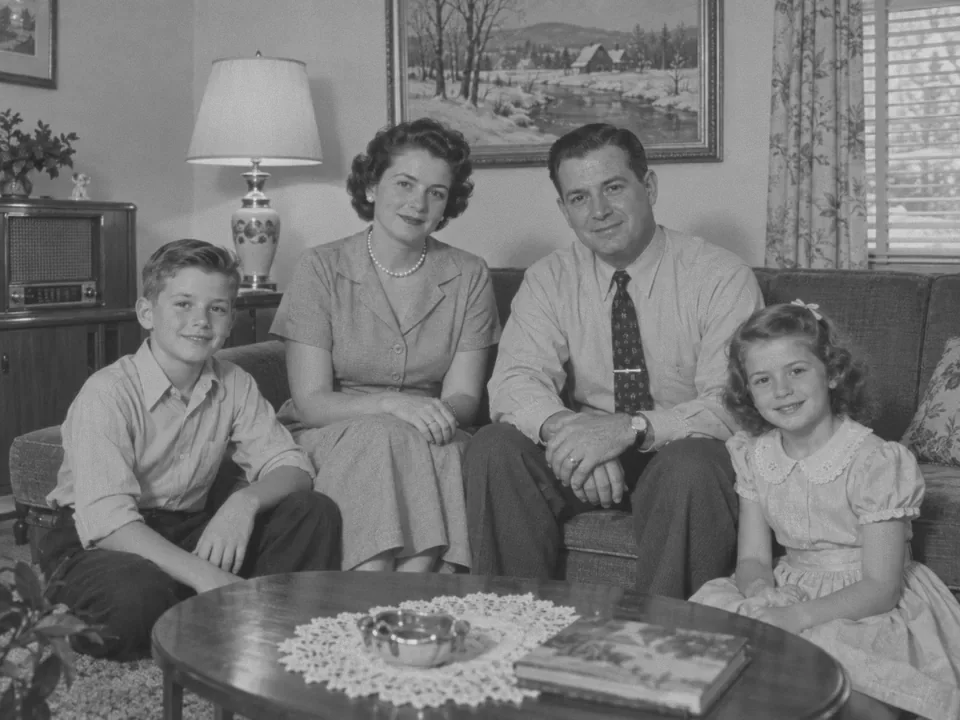
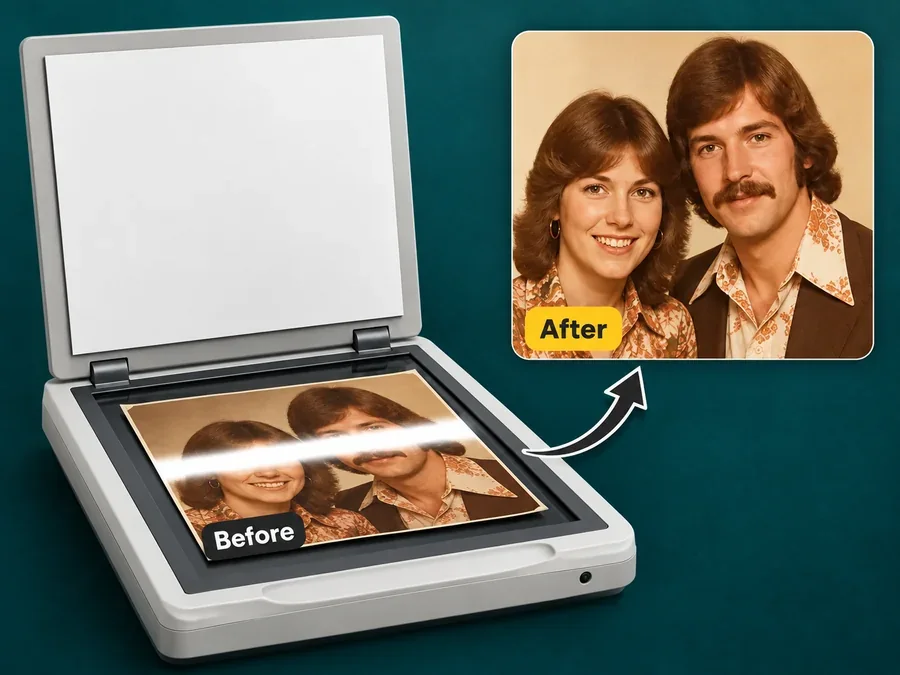
Fix scanning problems. Glare bands from a scanner lamp or reflections on glossy prints can be cleaned with the glare remover; halftone dots from magazine and newspaper photos with descreen; motion blur and soft focus with unblur image.
Print fresh copies. A 600 DPI scan of a 4x6 print can be reprinted sharply at up to 8x12. Use photo print sizes to compare sizes at true scale, crop the scan to 4x6, 5x7 or 8x10, and lay out several copies on one sheet for relatives.
Image Digitisation: Common Questions About the Process
Image digitisation, or digitizing images, simply means turning a physical original into pixels. A few questions come up again and again when digitizing pictures:
How do I digitise old photos? Is that different from digitizing? No: digitise is simply the British spelling. Whether you digitise photo prints, digitise photographs from an album or digitize printed photos cut from a magazine, the methods and settings in this guide are the same. Searches for how to digitise photographs or how to digitalize photos lead to exactly the same steps.
Is a digitized photo as good as the original? A good scan at 600 DPI captures essentially all the detail a print holds. The digital copy also never fades further, so over time it can look better than the paper it came from, especially after restoration.
Should I throw away the prints after scanning? No. Keep the originals, stored flat in acid-free boxes or archival sleeves, away from heat, light and damp basements. The scan is a backup, not a replacement.
How long does it take to digitize my old photos? On a flatbed, budget one to two minutes per scan; a phone app takes seconds. A box of 500 prints is a few evenings with a scanner, or one afternoon with a phone, which is why many people mix the two.
Frequently Asked Questions
What is the best way to digitize old photos?
For a few hundred prints, the best way to digitize photos is a flatbed scanner at 600 DPI, saved as high-quality JPG or TIFF. For a quick start, a free phone app such as Google PhotoScan is good enough for sharing and small prints. For thousands of prints, slides or negatives, a mail-in scanning service saves weeks of work. Whatever you choose, back up the files in at least two places.
What DPI should I scan old photos at?
The Library of Congress suggests 300 DPI for standard 4x6 and 5x7 prints, and 400 to 600 DPI if you want to enlarge them to 8x10 or bigger. Many archivists simply scan every print at 600 DPI so they never have to scan it again. Use 1200 DPI for wallet-size or smaller prints, and about 2000 to 4000 DPI for slides and negatives.
Should I save scanned photos as JPG or TIFF?
TIFF is lossless, so it is the best archival master, but the files are large. High-quality JPG is a good choice for most families and is what the Library of Congress suggests for color photos you may reprint. A common approach is to keep a TIFF or maximum-quality JPG as the master and make smaller JPG copies for sharing.
Can I digitize photos with my phone?
Yes. Apps such as Google PhotoScan photograph the print from several angles to remove glare and crop it automatically, and Photomyne can scan several prints at once. You can also use the normal camera: lay the print flat in even light, hold the phone parallel above it, turn off the flash and crop afterwards. A phone is fine for sharing; a scanner captures more detail for enlargements.
How do I convert photos to digital without a scanner?
Use a phone scanning app, photograph the prints with a camera on a copy stand or tripod, or send them to a scanning service. Many photo labs and some pharmacies also scan prints, slides and negatives in store.
How much does it cost to digitize photos?
Doing it yourself is free with a phone app, or the cost of a scanner (budget flatbeds start around the price of a dinner out). Mail-in services charge per photo; reviews of services such as DigMyPics have quoted roughly 39 cents to about a dollar per item depending on resolution and format, but prices change, so check current rates and shipping costs.
How do I organize old scanned photos?
Use a consistent file name that starts with the date, such as 1985-07-14_beach_grandma_001.jpg, put files in folders by year or event, add names and captions in the photo’s description or metadata, and scan the back of any print with handwriting. Do the sorting before you scan; it is much easier with paper in your hands.
How do I back up digitized photos?
Follow the 3-2-1 rule: three copies, on two different kinds of storage, with one copy somewhere else, such as a cloud service or a drive at a relative’s house. The Library of Congress also recommends moving your collection to current storage every five to seven years.
Can AI restore old scanned photos?
Yes. After scanning, AI tools can repair fading, sharpen faces, remove glare and noise, and add natural color to black-and-white photos. Keep the original scan untouched and save restored versions as copies, because AI rebuilds fine detail and you may want the unedited file later.
More Guides and Tools
- Image enhancer: repair faded, blurry and noisy scans.
- Colorize image: add natural color to black-and-white photos.
- Photo print sizes: reprint scans at 4x6, 5x7 and 8x10.
- How to fix grainy photos: reduce noise in old and low-light pictures.
- What is a moiré pattern?: why scanned magazine photos get wavy patterns.